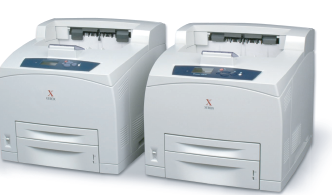
Troubleshooting Steps for the U1 – Main Drive Motor Failure On the Xerox Phaser 4500
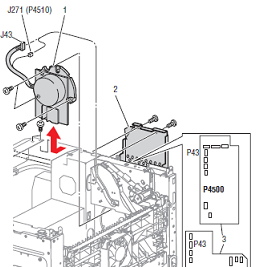
While the U1 – Main Drive Motor Failure is not a common error it’s bound to happen ever now and then. Most the time I would say the toner cartridge or fusing assembly will be the items of concern when troubleshooting this problem. I will say though, that I’ve seen lots of toner cartridge problems on the OKI version of this engine and most times when the cartridge gets bound up you will hear a loud grinding noise followed by no or light print so the fusing unit would be the item that I would look at first. Although if you think the toner is the issue, when you remove the toner cartridge and turn the machine off and back on the main motor should rotate so that is the first and easiest step to perform when troubleshooting. Below is a more detailed guide of troubleshooting the U1 – Main Drive Motor Failure error from the Xerox Phaser 4500 and 4510 service manual.
Service Manual Instructions for troubleshooting the U1 – Main Drive Motor Failure
1. Remove the left cover.
2. Enter Service Diagnostics and check main motor operation.
Does the main motor rotate, and each gear rotate normally?
If the motor rotates Replace the HVPS/engine logic board.
If the motor doesn’t Rotate check each gear of the gear assembly housing and plate gear assembly.
Does each gear rotate normally?
Yes – Go to Main Motor Test
No – Replace the parts causing the obstruction
–
–
–
–
Main Motor Test
Check the LVPS harness assembly for continuity:
1. Remove the LVPS Shield Plate
2. Disconnect P/J41 from the LVPS.
3. Disconnect P/J11 from the HVPS/engine logic board.
Is each cable of P/J41 <=> P/J11 continuous?
Yes – Go to step 4.
No – Replace the LVPS harness assembly.
4. 1. Remove the LVPS Shield Plate.
2. Disconnect P/J42 from the LVPS.
3. Disconnect P/J10 from the HVPS/engine logic board.
4. Check each wire in the LVPS harness (2) between P/J42 and P/J10 for continuity.
Does each wire in the harness exhibit continuity?
Yes – Replace the LVPS (page 8-62), then go to step 5.
No- Replace the LVPS harness assembly
5 Turn ON the printer.
Does the main motor rotate?
Yes – Problem solved.
No – Replace the HVPS/engine logic board then go to step 6.
6 Turn ON the printer.
Does the main motor rotate?
Yes – Problem solved.
No- Replace the main motor
Entering Service Diagnostics on the Xerox Phaser 4500 – 4510
1. Turn the printer power OFF.
2. Hold down the Back and Information (P4500) or Help (P4510) buttons simultaneously and turn the printer back ON.
3. Continue to hold the buttons until the following message is displayed on the control panel: Entering Service Diagnostics, and then release the buttons.
4. The control panel displays the Service Diagnostics Menu.
5. Scroll down to the Motors / Fans Test Menu
6. Once in the Motors / Fans Test Menu scroll down to main motor and enter
7. You could also run the Main Motor+Clutch/Sol Tests to further diagnose if the main motor test passes.


