Instructions for the Lexmark E260, E360, E460 Fuser Replacement – 40X5344
On these models the fuser life tends to vary from series to series but the fuser stays the same. If I’m thinking right some of the models have 120,000 PM cycles, while others have 150,000 PM’s and I think the high end versions go up to 200,000. Your machine or fuser will let you know when it is time to change. The 80 Scheduled Maintenance is the life warning for the machine which I just talked about. Other problems can be 92X Error codes related to temperature issues in the fuser or print quality issues. Below find the Lexmark E260, E360, E460 Fuser Replacement instructions.
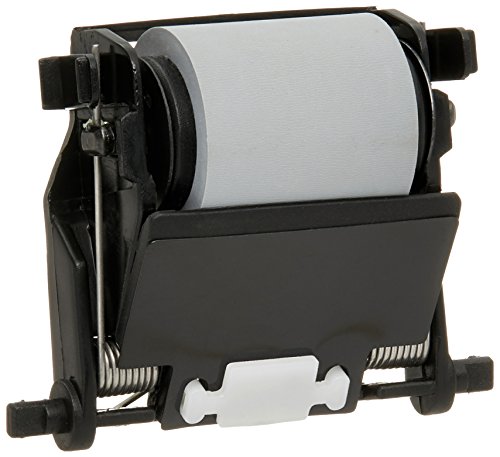
40X5344 E260, E360, E460 Fuser Assembly
The fusing assemblies tend to last for a very long time and hold up pretty well. When I’ve changed them it’s been because of maintenance messages or odd feed problems. You will note the instructions are pretty involved but can be handled rather quickly once you get it down. It looks harder than what it actually is. With that being said if you feel you need to replace the part your better off just making the call quickly rather than fool around with it because it is buried and who wants to take it out several times. Just replace it and get on with life.
–
–

Left side cover removal
Note:
• Leave the front door closed when removing the left side cover.
1. Remove the paper tray.
2. Remove the screw from the rear left side of the printer.
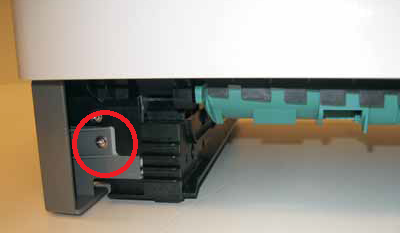
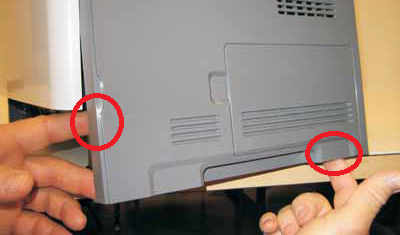
3. Remove the screw, and press the two latches on the bottom of the left side cover
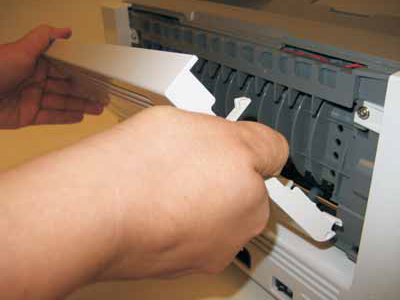
4. Swing the cover open, and lift to remove the left side cover.
Right side cover assembly removal
Note: Leave the front cover closed when removing the right side cover assembly.
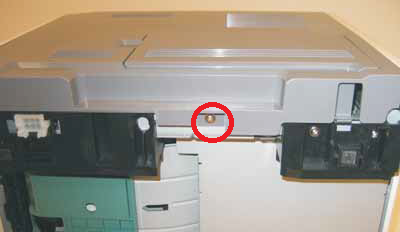
1. Remove the one screw from behind the paper tray.
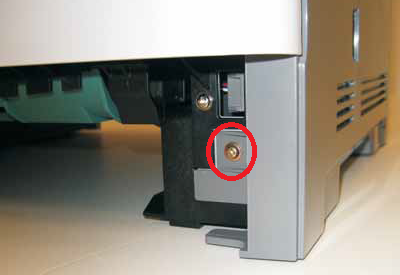
2. Remove the screw from the bottom right side of the printer.
3. Press the latches.
4. Rotate the right side cover assembly out, and remove.
Rear door and rear cover removal
1. Open the rear door.
2. Pull the rear door up at an angle, disconnect the door from the notch, and remove.
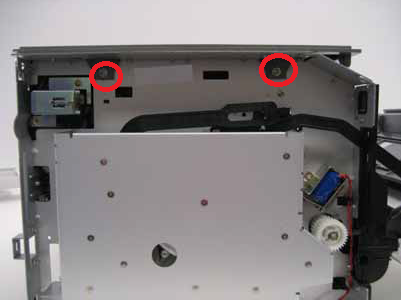
3. Remove the two screws from the top of the rear cover.
4. Tilt the rear cover, and remove.
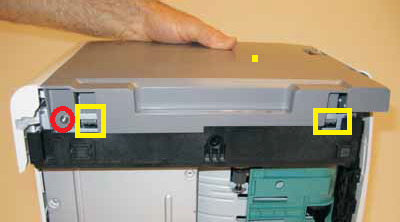
Top cover assembly removal
1. Open the front access door.
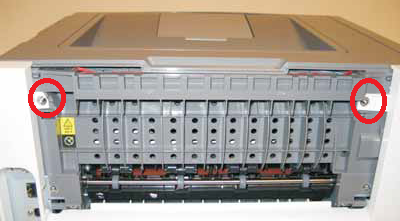
2. Remove the two screws from the left side of the printer.
3. Remove the two screws from the right side of the printer
4. Lift the top cover, and remove.
Note:
• Be sure to lift the top cover assembly from the front to remove.
• During reinstallation, be sure the exit guide and the paper bin align correctly. A mismatch can cause paper
jams.
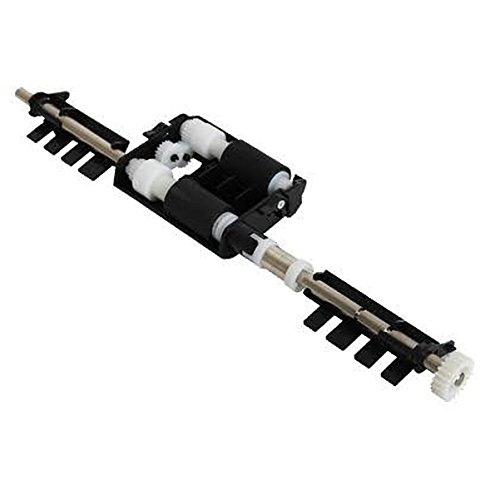
Rear exit guide assembly with sensor and reversing solenoid removal
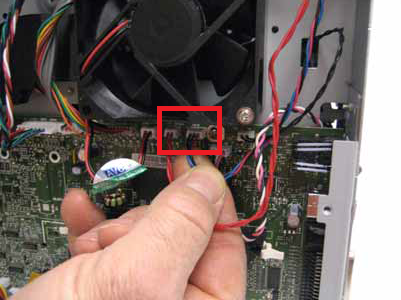
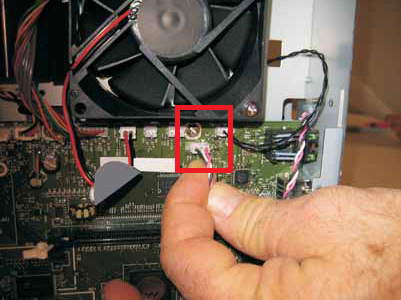
1. Disconnect the narrow media sensor cable and the reversing solenoid cable.
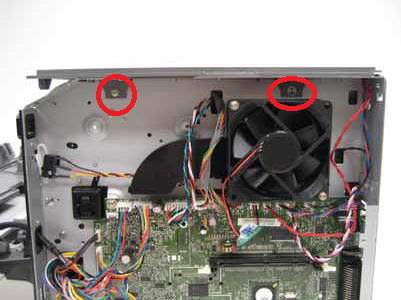
2. Remove the six screws from the rear exit guide assembly.
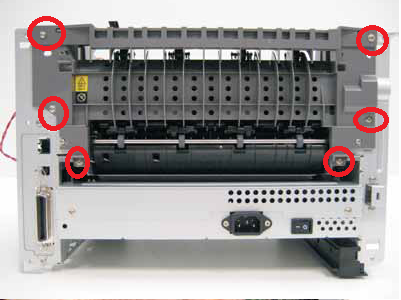
3. Remove the solenoid cable through the opening.
4. Remove the narrow media sensor cable through the opening.
5. Remove the rear exit guide assembly.
Note: Be careful to not damage the gears during the rear exit guide assembly removal and reinstallation.
Fuser removal
1. Remove the two screws.
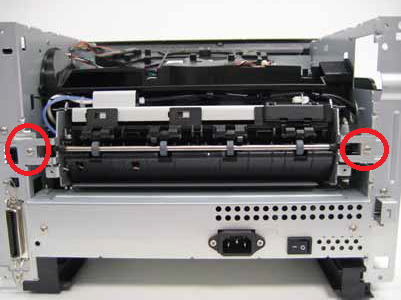
2. Partially pull the fuser forward for better access.
3. Push in on the cable connector cover, and remove.
4. Disconnect the AC cable.
5. Disconnect the thermistor cable.
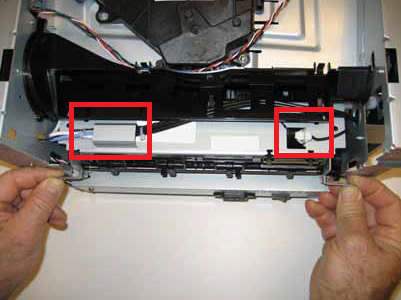
6. Disconnect the exit sensor cable from the controller board.
7. Remove the fuser.
Note:
• Be careful to not damage the gears during the fuser installation.
• Be sure to reinstall the AC cable during the fuser installation.
Below I’ve listed the fusing assembly by itself and I have the maintenance kit listed too. If you print off the config page and you have 50,000 or more pages on the machine and haven’t done any real maintenance to the machine then it might not hurt to spend a few more bucks and just do the PM kit.
My Personal Favorite Machine that I recommend to customers
———————————————————————————————