Brother HL 4140, 4150, 4570 Fuser Assembly Removal and Reset Procedure

Fuser Assembly Removal and Reset Procedure for the Brother HL – 4140, 4150, 4570
As with most these fuser assembly removal instructions articles I’ve posted I’m not going to get into a lot of detail about the specific fuser errors and messages. This article is just about the removal and the reset of the counter for the fusing unit. Unlike previous higher end Brother printers these fusers are only rated at 60,000 prints. I think a lot of this has to do with the fact that often on the older models the fusing assembly would start having issues before the 80,000 life they were recommended at. Anyway, here is the fuser assembly removal and reset procedure. If you have problems with the pictures you can always click on them for a better view.


Back Cover Removal
1. Open the Back cover.
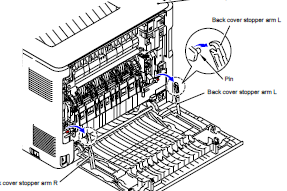
2. Remove the Back cover stopper arm L and R from the Main body.
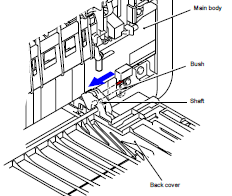
3. Remove the Shaft of the Back cover from the Bush on the right side of the Main body.
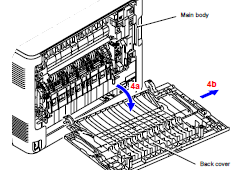
4. Remove the Back cover.
 –
–
–
–
–
Back Flapper Removal
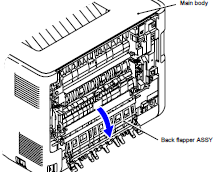
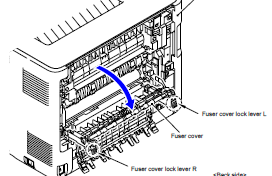
1. Open the Back flapper assembly.
2. Release of the Fuser cover lock lever L and R and open the Fuser cover.
Right, Left, and Cover Removal
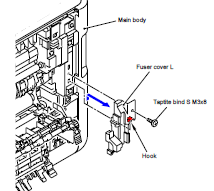
1. Remove the Taptite bind S M3x8 screw from the Fuser cover L.
2. Release the Hook to remove the Fuser cover L from the Main body.
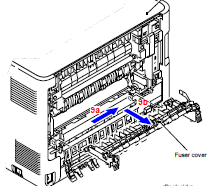
3. Slide the Fuser cover in the direction of the arrow 9a to remove it to the front.
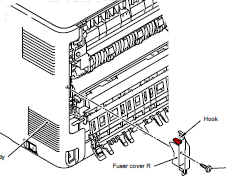
4. Remove the Taptite bind S M3x8 screw from the Fuser cover R.
5. Release the Hook to remove the Fuser cover R from the Main body.
–
–
–
–
–
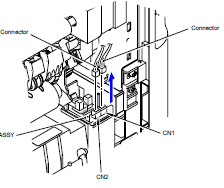
Connector Removal
1. Disconnect the two Connectors (CN1, CN2) from the Paper eject sensor PCB assembly.
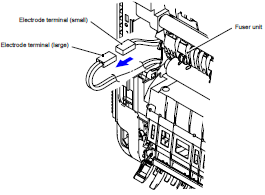
2. Disconnect the Electrode terminal from the Fuser unit.
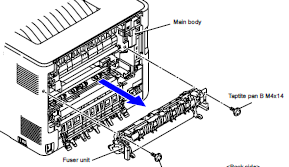
Fuser Unit Removal
1. Remove the two Taptite pan B M4x14 screws to remove the Fuser unit from the Main body.
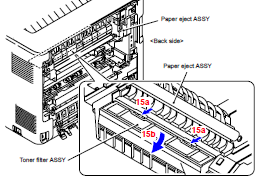
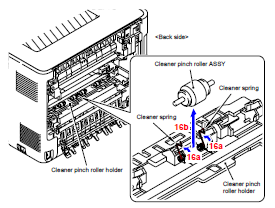
Toner Filter and Cleaner RollerRemoval
1. Remove the Toner filter assembly from the Paper eject area
2. Hold down the Cleaner spring of the Cleaner pinch roller holder to remove the Cleaner
pinch roller unit.
Fuser Assembly Reset Procedure
1. Press the Go and UP buttons at the same time in the ready state.
2. The “Reset Menu†will appear on the display. Select the applicable periodical replacement part or consumable part by pressing the UP or DOWN button and press the OK button.
– Drum unit
– Belt unit
– PF kit MP
– PF kit1
– PF kit2
– Fuser unit
– Laser unit
3. Once “ UP Arrow-Reset DOWN Arrow -Exit†appears on the display, press UP the button.
4. The printer implements clearing the counter.

