Brother 9440, 9450, 9840, 9040, 9045 Fuser Removal Instructions
Fuser Removal Instructions for the Brother 9440, 9450, 9840, 9040, 9045
After 80,000 prints or copies the machine will ask you to replace the fusing assembly. Most times the fusing assembly is worn out at this point and is due to be replaced. Other signs of wear and tear can develop earlier if you are using heavy card stock or specialty paper. Sometimes the pick fingers will wear out the outer surface of the hot roller and leave smear marks down the page. Also, the outer coating on the pressure roller can detach from the rest of the roller causing poor fusing and in extreme cases jamming as the roller starts to fall apart. If you are experiencing any of these problems then you should remove the fusing assembly and check for signs of extreme wear.
Genuine OEM Brother Fuser Assembly Unit 110V for Color Laser Printer All-in-one DCP-9040CN, DCP-9045CDN HL-4040CDN HL-4040CN HL-4070CDW MFC-9440CN MFC-9450CDN MFC-9840CDW
Fuser Removal Instructions
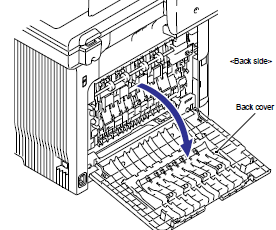
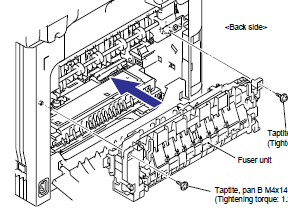
1. Open the Back Cover
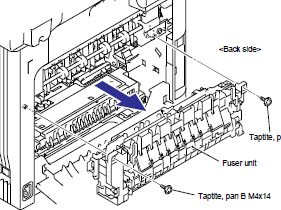
2. Remove the two screws on the top sides of the fuser then pull out the Fuser unit to the back of the machine.
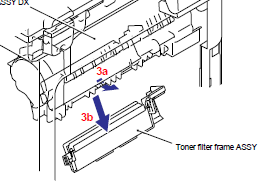
3. Remove the Toner filter frame assembly from the paper eject assembly DX.
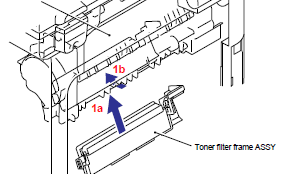
1. Assemble the Toner filter frame assembly onto the Paper eject assembly DX.
2. Put the Fuser unit into the machine and fix it with the two screws.
Note: The screws screw into a plastic frame so it is very important that you do not over tighten them.
Click on the link below for additional details and buying options.

