Lexmark MX310 40X8736 ADF Pick Up Roller Replacement Procedure
Below you will find the Lexmark MX310 40X8736 ADF Pick Up Roller Replacement Procedure. This procedure is not as easy as it is on some models. However, I believe with a little patients, this can be a job done by just about anybody.
Cause for Lexmark Lexmark MX310 ADF Pick Up Roller Replacement
These machines can really scan documents. It’s pretty impressive on how quick they can scan. Lots of people are using these machines to scan more than they are being used to print. I’ve seen more than a few have more scans than printed pages on them. Given that fact, I have been replacing the pick up roller and separation roller in them. Around 150,000 pages the separation roller starts showing real signs of wear and tear and it starts causing feed problems. Replace the pick up roller and separation roller and we are back in business.
Note : Just remember to order in the separation roller assembly. These parts really need to be replaced at the same time.


Lexmark MX310 40X8736 ADF Pick Up Roller Replacement Instructions
OK, the service manual doesn’t really tackle this procedure.
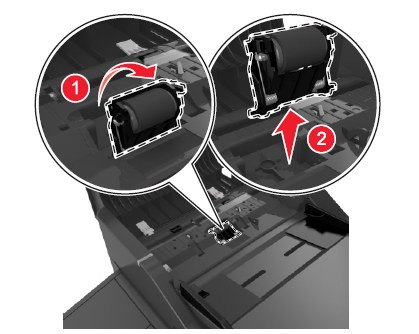
1. There is two clips on either side of the pick up assembly circled in red. Unclip them and pull them down about 90 decrees and the assembly should just pop out.
2. The replacement assembly goes in the same way.
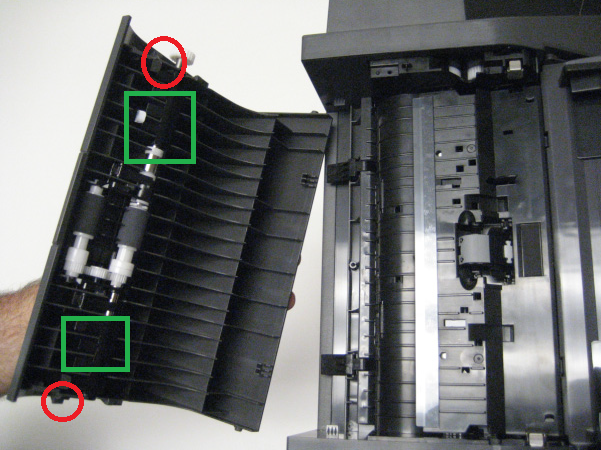
The only thing I’ve had issues with is the paper guides marked in green in the picture. They need to lay flat in the assembly with a little play. The clips that lock in place have inner clips to hold it to the metal shaft. These inner clips cause a little problem with the guides during install. I’ve found it a little easier to get the pick up assembly in and then mess around with the guides to get them in the right position. Again, they should be flat like the picture shows but they also should fit freely on the shaft to allow for movement.
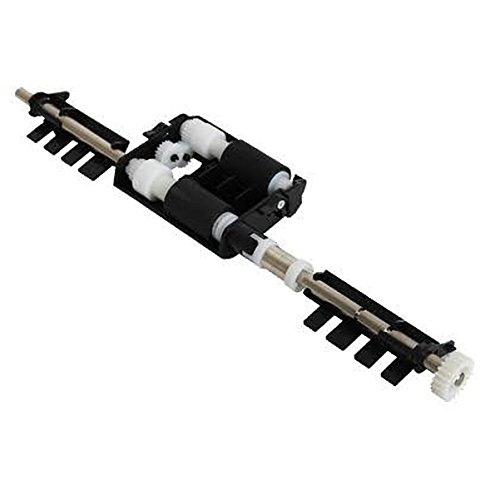
ADF separator roll removal
1 Open the ADF top cover.
2 Squeeze the latches to release the separator roll.
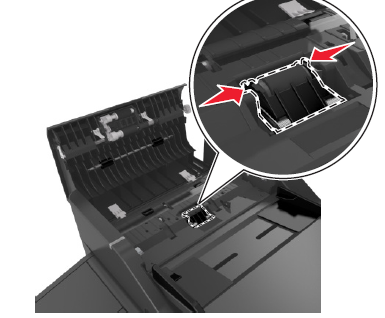
3 Pull away the separator roll and remove.
Hopefully that was helpful and you got the job done. And I hope you have better luck than me when it comes to putting the pick up roller back in place. I have to admit, I’m getting better but I still feel like I should be putting it in faster. There is a video that shows how to do it on the internet but I still don’t think the person doing it exactly gets what he is doing.