Lanier LD122 Laser Motor Replacment recommendations
Underneath you are able to discover the Lanier LD122 Laser motor replacement directions. The SC 320 Error is the normal root cause to be compelled to change or remove this piece. Sounds is often an additional thing. The older they get, the lubrication might wear down and you may get a loud noise off these devices as they get into action to printing velocity. Almost always, my first step would be to detach the element, go ahead and take the motor apart, clean up and lubricate the motor bushings and polygon motor shaft, and inspect if that does the job.
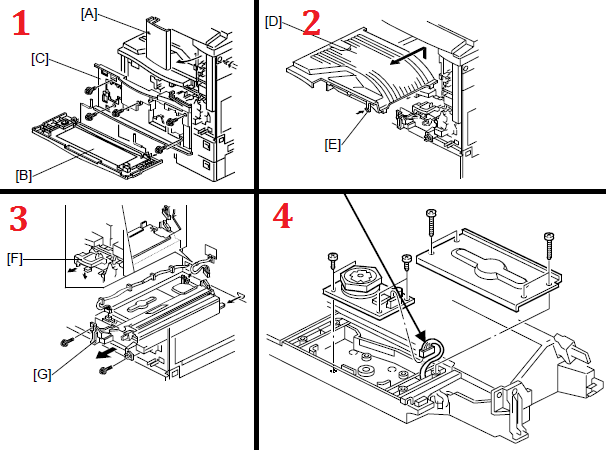
Lanier LD122 Laser Motor Replacement Procedure
WARNING
Turn off the main power switch and unplug the machine before attempting this operation. Laser beam can significantly can damage your eyesight.
1. Extract the optional finisher/bridge unit, and either the tray for the optional 1-bin tray unit or optional shift tray, if these units have been installed.
2. Obtain the upper front cover [A] (1 screw, 1 hook).
3. Detach the front cover [B] (2 pins).
4. Strip off the inner cover [C] (5 screws).
5. Take off the copy tray [D] (1 hook [E]).
6. Remove the toner bottle holder [F].
Note : If your just switching out or want to remove the motor you most likely don’t need to take out the whole element. Personally, I never have. And furthermore, it may possibly outcome in having to do Step 8.
7. Remove the laser unit [G] (2 screws, 2 connectors).
8. After reassembling the unit, perform the scanner and printer copy adjustments.
Remark : I’m not going to put this situation in here because I am not specifically sure if it’s required for this repair. I am sure, I at no time have had to do it. In addition, most of the people who seem to be still using these units usually aren’t highly bothered if print quality is a bit of reduced overall.