Canon imageRUNNER 1750,1740,1730 Fuser Replacement Procedure
I don’t have too many of these in the field but the ones I do service have been holding up pretty good and they make a nice little copier for small offices. The fuser is rated at around 160,000 pages. Below you will find the illustrated Canon imageRUNNER 1750,1740,1730 Fuser Replacement procedure along with fuser buying options.


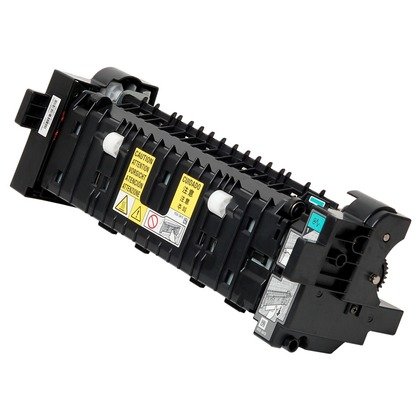
Canon imageRUNNER 1750,1740,1730 Fuser Replacement
CAUTION:
• The fusing unit can be removed while hot if your careful but the manufacture recommends that you allow 20 to 30 minutes of cooling before attempting the replacement.
• If you are having problems with the fusing unit, its just recommended to replace the unit as taking them apart can lead to unforseen issues.
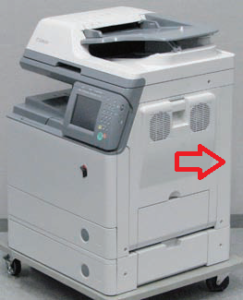
1) Open the Right Door Unit
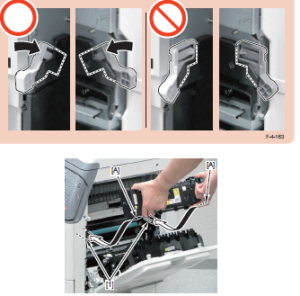
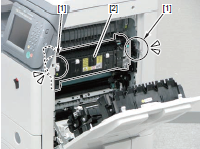
2) Release the 2 Fixing Lock Levers, and remove the Fusing Assembly
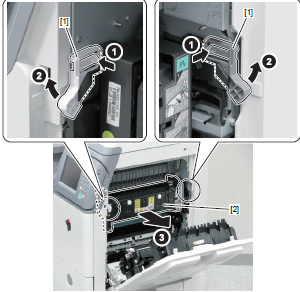
1) Install the Fixing Assembly by putting the 2 edges of the bottom of the Fixing Assembly into the 2 Fixing Rails
CAUTION:
Be sure that the lock of the 2 Fixing Lock Levers is released when installing. This is a no brainer. I don’t think you can install it with them in the wrong position so if you go to install it and it doesn’t seem to be fitting in then check these lock levers.
2) Lock the 2 Fixing Lock Levers, and secure the Fusing Assembly
3) Close the Right Door Unit.


How to change the Fixing Assembly for the imageRUNNER ADVANCE 400IF.
How to change the Fixing Assembly for the imageRUNNER ADVANCE 400IF. Canon imageRUNNER ADVANCE 400IF Fixing Assembly, compatible with: For ...