Instructions for the Lexmark T654, T652, T650 Maintenance Kit Replacement
I don’t really have a lot to say about this article. The Lexmark T654, T652, T650 Maintenance Kit Replacement Instructions title explains it pretty well. After 300,000 pages you will get a maintenance message. At this point it is time to order in the maintenace kit and replace the PM parts included. After the end of this article I have provided the instructions on how to reset the PM counter. Also, in the article you will find links to purchase a PM kit if you still need to get it.
Lexmark T650N 110V / 120V Lexmark T650N Maintenance Kit (Genuine)
Fuser Maintenance Kit – Genuine Lexmark Part Kit Includes:
110V Fuser Unit [40X4418]
Transfer Roller [40X1886]
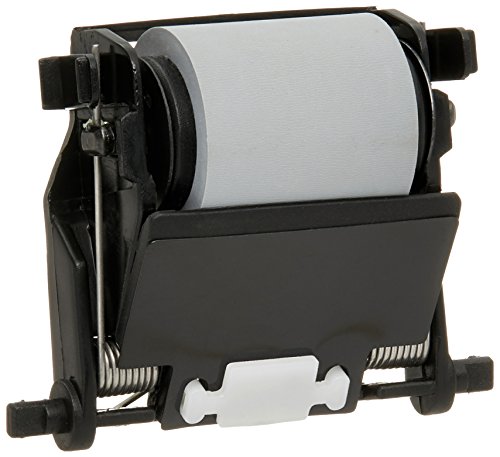
Charge Roller [40X5852]
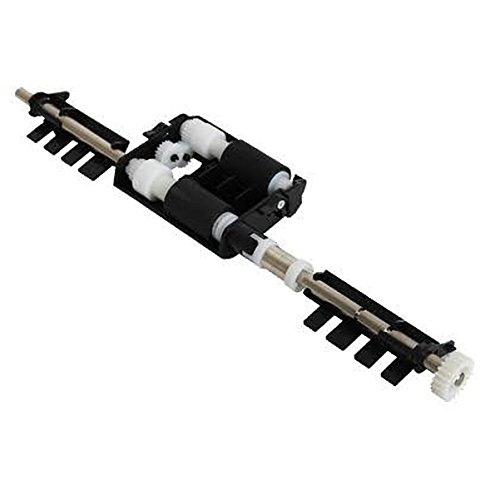
Pickup Rollers [40X4308]
Lexmark T654, T652, T650 40X4724 Maintenance Kit (Type 1)

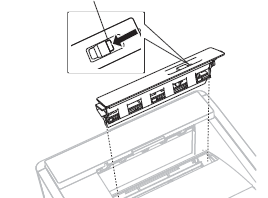
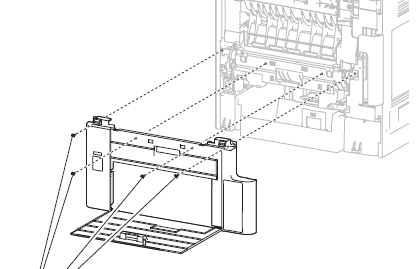
Lexmark T654, T652, T650 Fuser wiper cover assembly removal
1. Press the button (A) securing the fuser wiper cover assembly to the machine.
2. Remove the fuser wiper cover assembly.
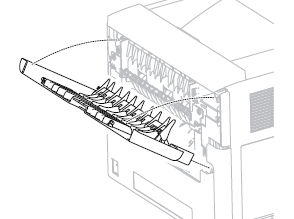
Lexmark T654, T652, T650 Door assembly, rear removal
1. Pull the door assembly, rear away from the machine.
2. Twist the door strap left or right until vertical, and pull the strap out of the slot.
3. Position the door assembly, rear at a 45 ° angle as shown in the picture.
4. Remove the door assembly, rear.
Note : The Rear lower cover and Duplex guide assembly only need to be removed on the T654 and T652 models
Lexmark T654, T652 Rear Lower Cover Assembly
1. Open the rear lower door.
2. Remove the four screws securing the cover assembly, rear lower to the machine.
3. Remove the cover assembly, rear lower.
Lexmark T654, T652 Duplex guide assembly, rear removal
1. Remove the media tray.
2. Gently place the printer on its left or right side.
3. Remove the two screws securing the two retainers to the machine.
4. Remove the two retainers.
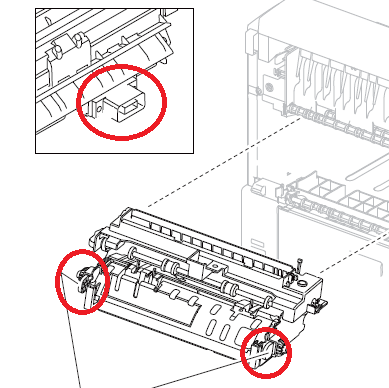
Lexmark T654, T652, T650 Fuser Assembly Replacement
1. Open the fuser access door.
2. Press the two buttons on the fuser unit assembly to release it from the machine.
3. While pressing the two buttons, pull the fuser unit assembly from the machine.
Replacement Warning: When replacing the fuser unit assembly, ensure that the electrical connection and the two buttons are properly secured.
Lexmark T654, T652, T650 Transfer Roller Replacement
1. Open the operator panel door assembly.
2. Remove the print cartridge.
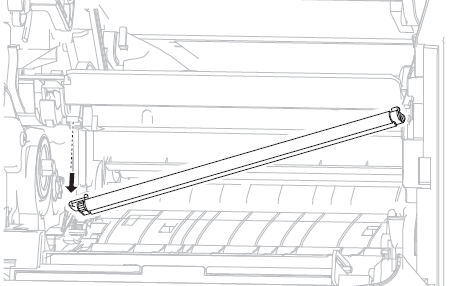
3. Gently unsnap the transfer roll assembly from the machine.
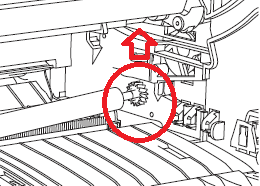
4. Remove the transfer roll assembly.
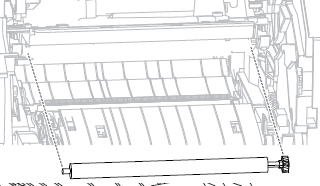
Replacement Warning: When replacing the transfer roll assembly, do not touch the foam surface. On some parts I would say not touching is a little overrated but in this case I would say it is very important not to touch this part.
Lexmark T654, T652, T650 Charge roller Replacement
Note : It might be easier to remove the charge roller if you slightly lower the top cover door. This will lower the arms that hold the charge roller in place, making it easier to separate the roller post from the holder. Careful that you don’t bend the holders to far as they can break.
WARNING: When removing and installing the charge roll assembly, avoid touching the charge roll surface.
1. Open the MPF door assembly.
2. Open the operator panel front cover assembly.
3. Detach the left side of the charge roll assembly from the machine.
4. Detach the right side of the charge roll assembly from the machine.
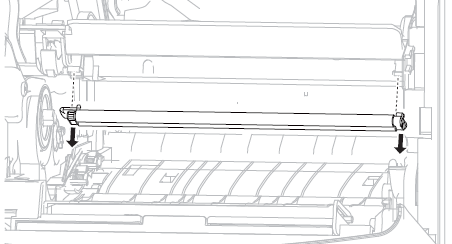
5. Remove the charge roll assembly.
Lexmark T654, T652, T650 Pick Roller Replacement
1. Remove the media tray.
2. Gently pull the pick arm assembly down, and release the two hooks securing the two pick up rollers.
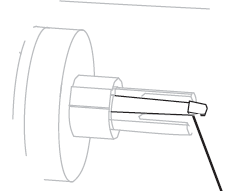
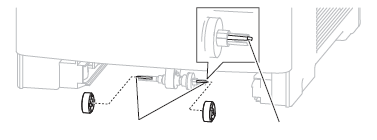
3. Remove the two pick rollers.
Replacement Warning: When replacing the pick rollers the manufacture advice to not touch the rubber surface on the rollers. Also, be careful not to over bend the hook that holds in the rollers on the shaft. Been there, done that. Over time they will get brittle. Just apply enough pressure to release the rollers to avoid breaking the hooks.
Lexmark T654, T652, T650 80 Scheduled Maintenance Reset Procedure
Instructions to get into Configuration Mode
1. Turn off the printer.
2. Press and hold the select (√) and right arrow (>) Buttons .
3. Turn on the printer.
4. Release the buttons after 10 seconds.
To view the maintenance page count:
1. Select Maint Cnt Value from CONFIG MENU.
2. Press the √ button to view the value.
Press Back to return to the main Configuration menu.
Maintenance page counter reset (Reset Cnt)
After scheduled maintenance, the servicer needs to reset the page counter.
To reset the maintenance page count to zero:
Select Reset Cnt from the Configuration menu, and then select Reset.
When the reset operation is complete, the display returns to the Configuration menu.
–