Instructions for the Kyocera FS1035MFP – FS1135MFP Fuser Replacement – FK-170U
These fusing assemblies are rated at around 100,000 prints. Some of them make it and others don’t the main problem I see with these units is when the pick fingers get debris on them and start digging into the outer surface of the hot roller. Once it scratches the top layer off then you typically start seeing a grey line or ghosting going down the page. It kind a looks like a toner or drum issue at first until you take a look at the hot roller surface and realize what is happening. I’ve also see these turn hard with age and cause noise and other issues. If you feel it’s time to take the part out and inspect it or replace it then follow the Kyocera FS1035MFP – FS1135MFP Fuser Replacement instructions below. Click on the link directly below to get up to the date pricing options and check availability.
–
Kyocera FS1035MFP – FS1135MFP Fuser Replacement Procedure
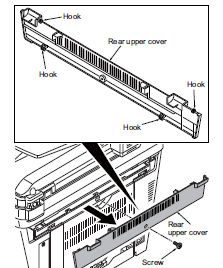
1. Remove the screw.
2. Unhook four hooks and then remove the rear upper cover.
3. Remove the cassette
4. Open the front cover.
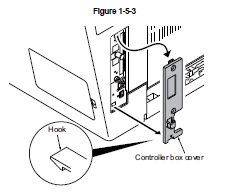
5. Unhook the hook and then remove the controller box cover.
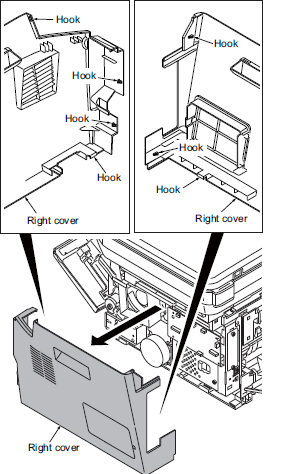
6. Unhook seven hooks and then remove the right cover.
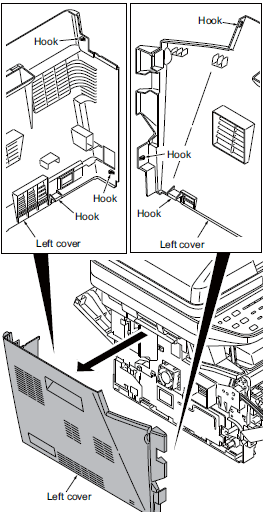
7. Unhook six hooks and then remove the left cover.
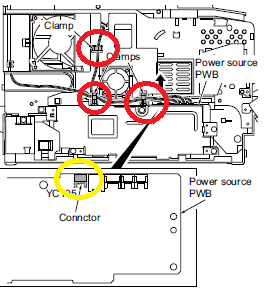
2. Remove the wires from three clamps.
3. Remove the connector from the power source PWB.
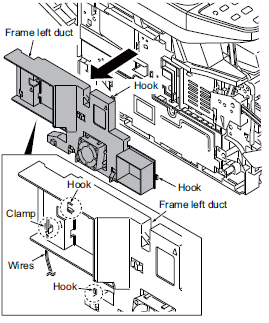
4. Unhook four hooks and then remove the frame left duct.
5. Remove the wires from the clamp
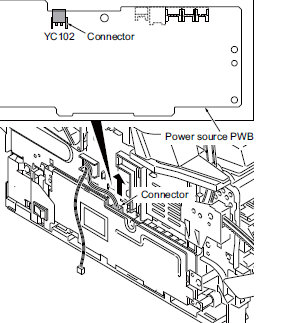
6. Remove the connector from the power source PWB.
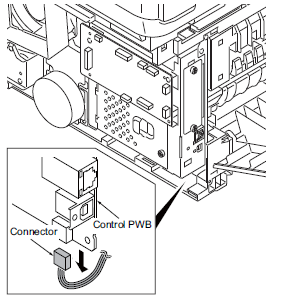
7. Remove the connector from the control PWB.
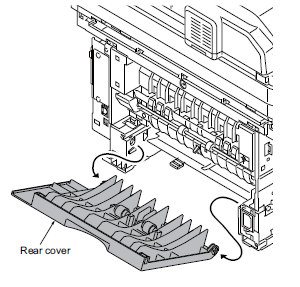
8. Remove the rear cover.
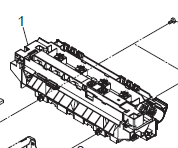
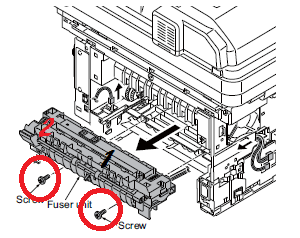
9. Remove two screws and then remove the fuser unit.
10. Check or replace the fuser unit and refit all the removed parts.
Caution: When reinstalling the fuser unit, tighten up a screw while pressing the fuser unit in order of 1 to 2.

Features
- Genuine Brand Name OEM
- 100% Guaranteed

