Brother DCP – 8080DN, 8085DN Fuser Replacement
Installation instructions for the Brother DCP – 8080DN, 8085DN Fuser Replacement
The fusing units in these machines are rated at around 100,000 prints and copies. Majority of the time they make it to the 100,000 mark. Rarely do I find that they make it to the 125,000 mark without having apparent issues so the life rating they gave them is pretty reliable. I know I always recommend my customers replace them when they get the replace fuser message. Below you will find the Brother DCP – 8080DN, 8085DN Fuser Replacement along with a few things that can lead to this needing done.
Fuser Related Error Messages – Fuser Errors tend to not go away until the machine is put into maintenance mode and the error is reset. Just replacing a Fuser to get rid of a message typically isn’t going to work. Before replacing the fusing unit for errors causing the machine not to work – Press, Menu,*,2,8,6,4 – Display will say – Maintenance – if done correctly – Press 9,9 – Machine will exit maintenance mode and start normal warm up procedure – if the error comes back you have a more serious problem replacing the fuser might be needed. If the message goes away then the machine probably experienced an accidental error condition.


–
Machine still works
Replace Fuser Message – Life Warning Message – Reset through user menu structure.
Machine will not work with the errors listed below
58 Fuser unit failure
59 Fuser unit failure (Detect fuser failure at start-up)
68 Temperature rise when heater is off
69 Mis-connect center thermistor connector
6A Fuser temperature does not reach 60 °C within the specified time (center thermistor)
6B Fuser temperature does not reach 100 °C within the specified time (center thermistor)
6C Fuser temperature exceeds its higher limit (center thermistor)
6D Fuser temperature exceeds its lower limit (center thermistor)
6E Fuser temperature does not rise (center thermistor)
6F Hardware detects extremely high temperature of the center or side thermistors
76 Rapid temperature rising failure (center thermistor)
78 Rapid temperature falling failure (center thermistor)
–
–
Brother DCP – 8080DN, 8085DN Fuser Replacement Procedure
Warning : Unplug the machine, You might want to let the machine cool off 15 to 30 minutes before doing this procedure as the fuser is extremely hot if it has been operating.
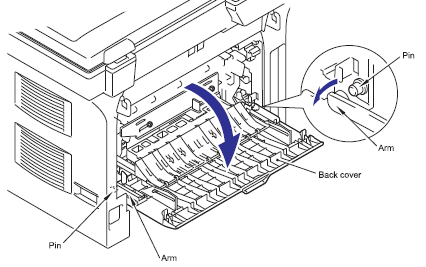
1. Open the Back cover
2. Remove the Arms of the Back cover from either side of the machine.
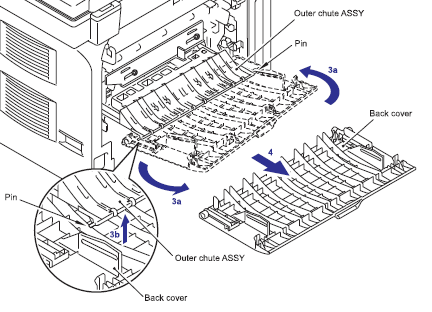
3. Remove the post of the outer chute assembly from the back cover
4. Remove the back cover
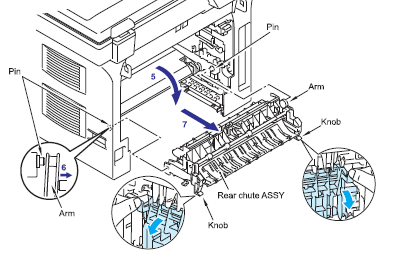
5. Pull down the rear chute assembly
6. Remove the post of the rear chute assembly from either side of the machine like the back door
7. Remove the rear chute assembly
8. Remove the screw holding the AC connector cover and remove the cover
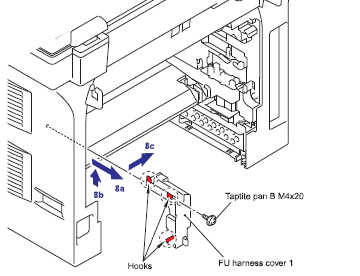
9. Disconnect the AC connector
10. Pull the thermistor cover off the right side. There is a clip in front. Depress that and pull the front of the cover towards the center of the machine to remove.
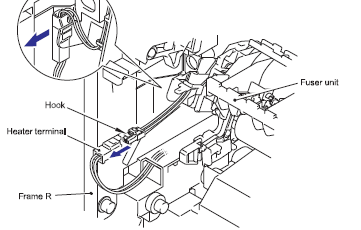
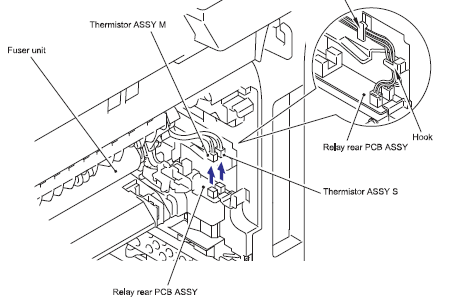
11. Disconnect the two wires on the relay board. Notice the two wire guides and how the wires are routed for re-installation
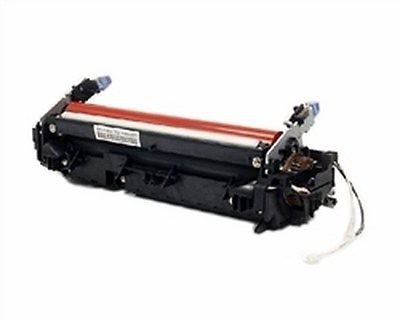
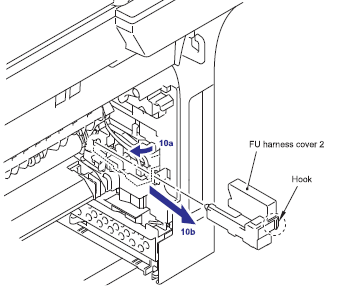
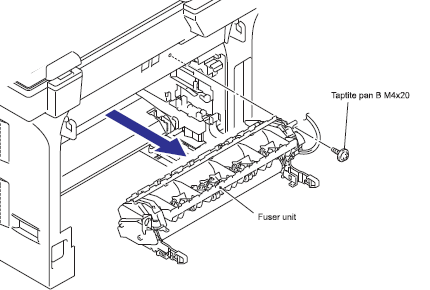
12. Remove the Fusing unit out the back of the machine
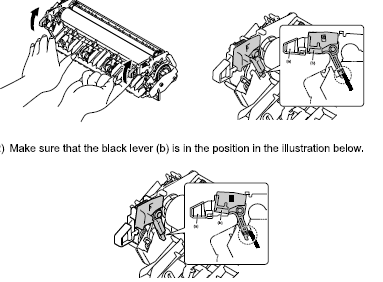
Installation Tip : When the fusers are shipped the pressure is removed from the pressure roller to prevent flat spots. When you install the new unit you have to release these lever. Follow the steps below to release the pressure on these parts.
Click on the link below for fuser pricing and buying options


