Repair advice for the Canon MF6590 – MF6530 Fuser Paper Jam
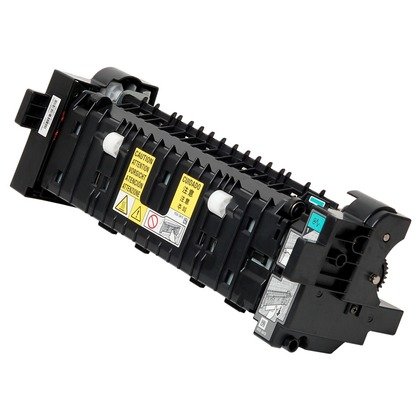
Alright you came to this page for troubleshooting tips for the Canon MF6590 – MF6530 Fuser Paper Jam Situation. The easiest way is to remove the fixing assembly and remove the paper that way. This way is the best for avoiding damage to the fixing unit and other parts in that area. The fixing film, pressure roller, and exit roller shaft can be damaged rather easy and if you don’t know what your doing it can end up costing more to fix the unit then what it would have.
OK, first thing to know is not to pull the paper out of the front of the machine. There is a paper jam sensor on the top part of the fixing assembly. If you pull the paper out backwards then you can break the sensor flag. So it needs to be pulled out the normal way the paper feeds through the machine.
Second, never stick anything in the fixing assembly. The heating element is covered by the fixing film sleeve. This sleeve is quite fragile and even a small nick will grow over time and eventually tear leaving the fixing film sleeve or whole fixing unit to need replaced. Also, there is a pressure roller in the unit. This roller, again, can be damaged easily and lead to print quality issues and other feed problems. Therefore, never stick a screw driver, needle nose pliers, or other pointy objects in the unit. Leave that to the professionals who know what to touch and what not to.
Third, the fuser appears to come out easily from the right side of the unit. This is not true. There are wires, adjustment pins, and a gear on the sides of the unit. If you try to pull the unit out without removing all the parts it is easy to break the gear or exit roller shaft in the rear of the machine.
Normally, I tend to give customers advice on removing jams themselves. Other parts of this machine it can be done with easy. However, jams in the fixing assembly on this machine are tough and hard to get out without some technical skills. If you get a jam in this area the best way is to remove the fixing assembly or to call a professional to avoid further repair cost and extended downtime of your machine.
If you feel you are up to the challenge of removing the fixing assembly then click on the link below for instructions on how to do this.