HP LaserJet CP1518, CP1515, CP1215 Fuser Removal Procedure
While these machines aren’t the most expensive machines some people tend to love them and they do a nice job. For those of you that still have, the good news is that parts are starting to become cheap. Below you will find the HP CP1518, CP1515, CP1215 Fuser Removal instructions along with a link to buy the fusing unit to perform this task.
HP RM1-4430 cp1518ni cp1515 cm1312 cp1215 Oem Fuser Assembly

Right Cover
 –
–
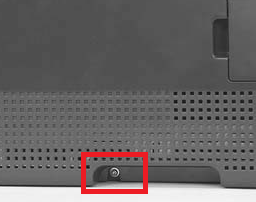
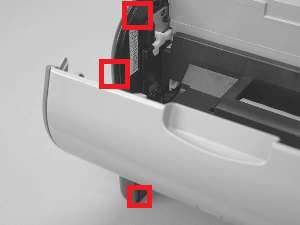
1. Remove one screw .
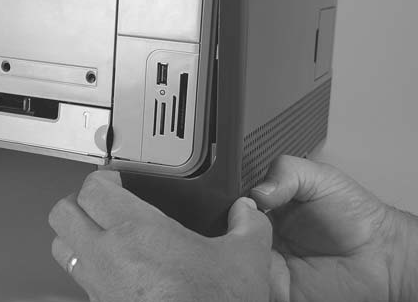
2. Carefully pry the front of the right cover away from the product to release one tab.
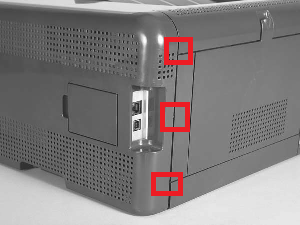
3. Use a small flatblade screwdriver to release three tabs at the back of the product.-
4. Rotate the bottom of the cover away from the product, and then slide it up to remove it.
Left cover
 –
–
1. Remove one screw .
2. Open the front door, and then use a small flatblade screwdriver to release three tabs.
NOTE: It might be easier to release the tabs if you first release the bottom tab, then the middle tab, and then the top tab.
3. Use a small flatblade screwdriver to release two tabs at the back of the product.
CAUTION: The bottom tab might be difficult to release. Make sure that you do not break the tab.
4. Rotate the bottom of the cover away from the product, and then slide it up to remove it.
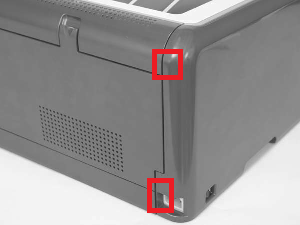
Rear-side cover
1. Open the rear door.
2. Use a small flatblade screwdriver to release two tabs.
3. Remove the rear-side cover.
TIP: Note the location of the mounting tabs on the rear-side cover.
Rear-upper cover
1. Open the rear door.
2. Use a small flatblade screwdriver to release two tabs (callout 1).
3. Pull the rear-upper cover away from the product to remove it.
Rear door and rear-lower cover
1. Remove two screws.
2. Release one pin, and then slide the rear door and rear-lower cover toward the side of the product with the interface connectors.
–
3. Remove the rear door and rear-lower cover.
4. Carefully pry the rear-door hinge arms off of the hinge pins on the rear-lower cover to separate the rear cover from the rear door.
NOTE: If you are installing a replacement rear-lower door, remove the feed assembly from the discarded door, and then install it on the replacement door.
Control Panel Removal
 –
–
–
–
Top cover
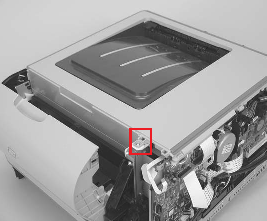
1. Remove one screw.

2. Release one tab.
3. Release two tabs.
4. Remove Cover.
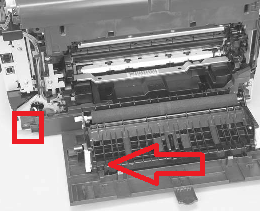
HP CP1518, CP1515, CP1215 Fuser Removal
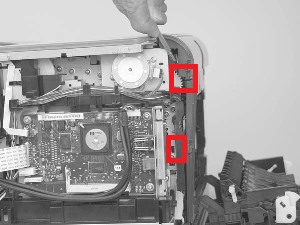
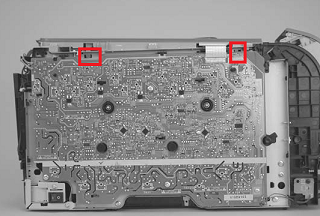
1. Remove two screws and the power-supply cover.
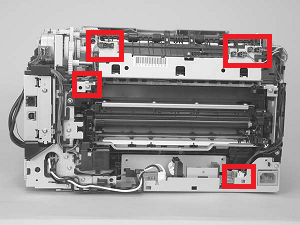
2. Disconnect five wire-harness connectors. Remove the wire harness from the guides and one retainer.-
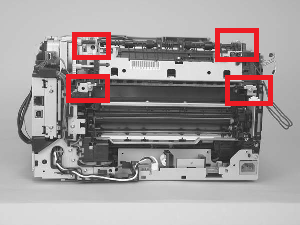
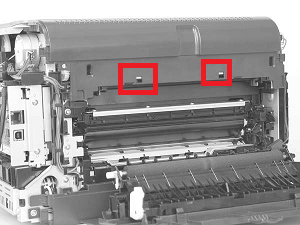
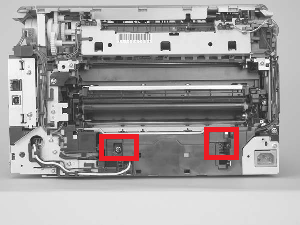
3. Remove four screws.
4. Remove the fuser.
CAUTION: Handle the fuser carefully. The sensors that are mounted to the output side of the
fuser can be easily dislodged. When the fuser is reinstalled, make sure that the sensors are present,
and correctly fastened to the fuser assembly.


i just came across this site and am happy I did. Kindly assist me to solve rear door access open error on my hp Color laserjet CP 1215 printer . All doors are properly closed . what do i do. Thanks