HP LaserJet CM2320 Fuser Removal Procedure- RM1-6740-000
These RM1-6740-000 fusers are a little surprising. I’ve been impressed on the copy counts on these machines and the fuser is still in good shape. I think a lot of it has to do with the speed. Lower speeds seem to be better on these fixing films. Most these fusers can get 100,000 prints on them unless something odd gets fed through them. Plus, these machines weren’t the cheapest things out there so people tend to want to keep them around. If your replacing the fuser you might want to check the pick up roller too. Below you will find the HP LaserJet CM2320 Fuser Removal procedure along with links to purchase a new fuser if needed.
HP CM2320 Fusing Assembly RM1-6740-000CN
Personal Note : The service manual talks about removing the side covers the scanner assembly, blah, blah, blah. I just replaced one of these fusers a few months ago and I didn’t look at the manual before I went. On the one I serviced all the connectors and screws were right there after I removed the rear cover so I am skipping a lot of the steps found in the manual. Also, don’t asked me about the warnings or the reinstall tips. Once again, I didn’t have the service manual and I took the unit out once then again once the replacement came in. I have no idea what HP is trying to warn you about.
HP CM2320 Fusing Assembly RM1-6740-000CN

Rear Door Removal
1. Open the rear door.
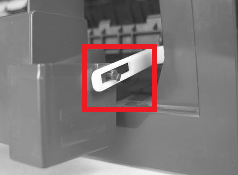
 2. Use a pair of needle-nose pliers to release two tabs, and then remove the link cap.
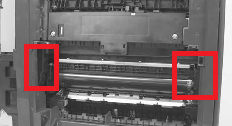
3. Remove four screws.
4. Before you remove the rear door, take note of the alignment pins on the door.
5. Remove the rear door.
Rear Cover and Feed Guide Removal
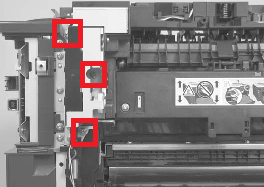
1. Carefully release the link guide from the pivot pin on the feed guide.

2. Remove three screws.
3. Release two tabs.
4. Carefully lift the cover up and then rotate it away from the product to remove it.
Reinstallation tip Make sure that the wire harnesses at the top of the chassis near the left-side
cover are correctly retained so that they are not pinched when the rear cover is reinstalled.
HP LaserJet CM2320 Fuser Removal Procedure
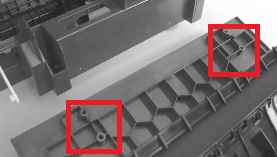
1. Duplex models only: Remove three screws (callout 1) and separate the duplex-reverse drive assembly from the product.
CAUTION: The duplex-reverse drive assembly is still attached to the product. Carefully set the assembly out of the way.
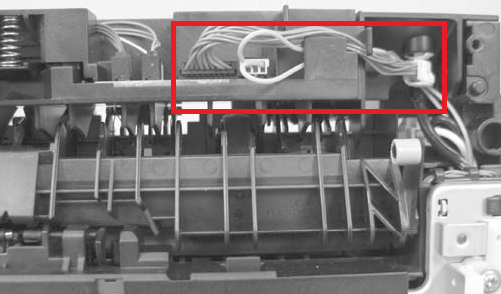
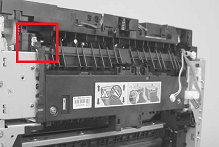
2. Disconnect two connectors, and then release the wire harnesses from the guide.
Reinstallation tip When the upper cover is reinstalled, make sure that these wire harnesses (near the connectors) are correctly routed under the cover.
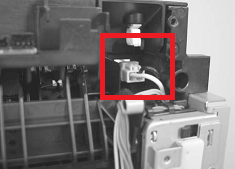
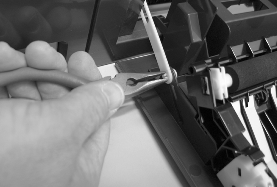
3. Disconnect one connector.
4. In the following step, the connector and guide will be separated from the fuser. You must not use too much force and damage the lower portion of the guide. If the guide is damaged, the fuser must be replaced.
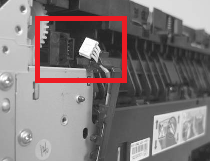
5. Carefully disconnect one connector and rotate the connector and the top portion of the guide away from the fuser.
WARNING! Do not separate the connector and guide more than is shown. If the guide is damaged, you must replace the fuser. Also, be cautious with the short, fragile connector.
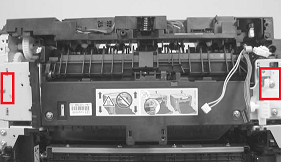
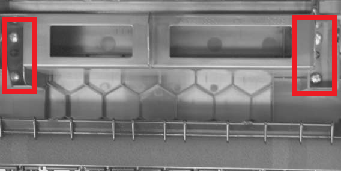
6. Remove two screws.
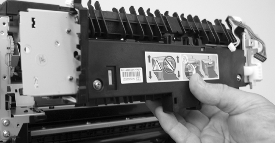
7. Remove the fuser.
8. Duplex models only: Remove two screws and remove the duplex-gear assembly. Install the assembly on the replacement fuser.
Click on the links below for buying options and additional details.
HP CM2320 Fusing Assembly RM1-6740-000CN

