List of the Xerox Phaser 3600 Repetitive Defects – Print Quality
Common Xerox Phaser 3600 Repetitive Defects
I’m always surprised on how some people pick out every single spec on a piece of paper and others I can barely read the print and the customer acts like nothing is wrong. In the article I’d like to talk about the Xerox 3600 repetitive defects and what part of the machine that causes them.
 –
–
–
–
–
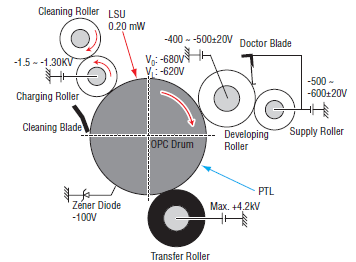
One of the easiest print quality issues to figure out is repetitive defects. You have several rollers inside the machine. When they get a mark or something gets on them they leave a mark that repeats down the page. If you take the first mark and measure the distance to the second mark you get the circumference of the roller causing the problem. In the picture above you can see several rollers in the toner cartridge along with the transfer roller found under the cartridge. Below is the list of the Phaser 3600 repetitive defects. The first black bold words are the unit the rollers are in. The red lettered words are the actual roller, and the blue lettered words are the measured distance between the first and second defects.
Xerox 106R01371 High Capacity Print Cartridge for Phaser 3600
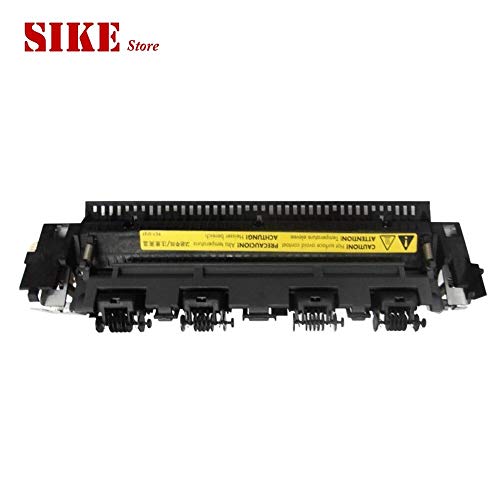
Genuine Xerox PHASER 3600N Fuser (Fixing) Unit – 120 Volt


Xerox Phaser 3600 Repetitive Defects List
Print Cartridge – Developer Roller – 50 mm (1.97 in.) – Horizontal image band
Print Cartridge – OPC / Drum – 94 mm (3.70 in.) – White spots on black image or black spots on white
Print Cartridge – Drum Charge Rollers – 38 mm (1.50 in.) – Black spots
Print Cartridge – Supply Roller – 42 mm (1.65 in.) – Light or dark horizontal image bands
Transfer Roller – Transfer Roller – 56 mm (2.20 in.) – Image ghost
Fuser Assembly – Heat Roller – 126 mm (4.96 in.) – Black spots and image ghost
Fusing Assembly – Pressure Roller – 126 mm (4.96 in.) – Black spots on back
Obviously not all print quality problems can be solved by simple measurements and the description might not always be the same as listed above. If you find your self stuck perform a half test to better isolate parts of the machines. Print a test page and stop the paper when it is under the toner cartridge. This should help determine if the problem is happening in the toner area or further inside in the fusing assembly.