Diagnosing the Restart Printer – Reseat Fuser Message on the Dell 2130CN Printer
The Reseat Fuser Message on these machines can mean several things. If you want to know more details about the error then follow the instructions below to get more information. I started reading the service manual on how to go about diagnosing this error and it kept going on and on. After awhile, my eyes got crossed and before I fell asleep from boredom, I quickly shut the manual and decided to write how I typically go about troubleshooting this error. I included what the manual has to say if you feel the need to go as far as what the manual does. In my personal experience, on just about any laserjet machine a reseat fuser or fuser failure message is pretty straight forward. 95% to 99% of the time the error is related to the fusing assembly. The other 1% it’s related to something else.
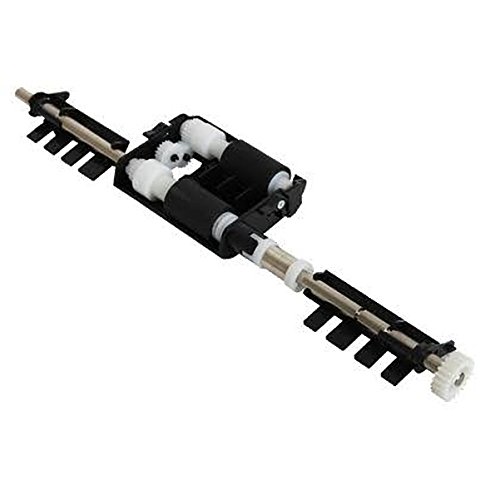
Dell 2130CN OEM Fuser Assembly, X722D, M266D, 330-1426, 330-3107, P241D
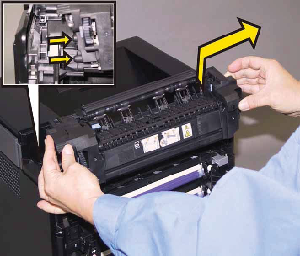
1. Turn the machine off then back on. Check the power source and make sure its plugged straight into a wall outlet. Reseat the fusing assembly and try again.
2. Inspect the fuser for extreme wear. Remove the fuser and check the surface of the rollers inside. If they are warped, wrinkled, and or discolored the fuser is probably near the end of its life and needs replaced.
3. Majority of the reseat fuser and fuser failure messages I get on Dell machines is because the thermostat inside the fusing assembly tripped open then failed to close when the machine cooled back down. So if you want to check this, the thermostat is on the back side of the fuser. Remove the back cover and check the continuity across the thermostat. If you have none then pull it out and using a can of air, hold the can of air upside down and give the front of the thermostat a quick blast. On top of the thermostat is a thin piece of metal. Usually you can press on it and it will click in and out. Sometimes when it gets to hot the metal will flip open. When it cools off the metal is supposed to filp close. Unfortunately that doesn’t always happen. A lot of times giving it a blast of extremely cold air fixes the problem. After you give it a blast check for continuity. If it fixes the problem, re-assembly the fusing unit then turn it back on.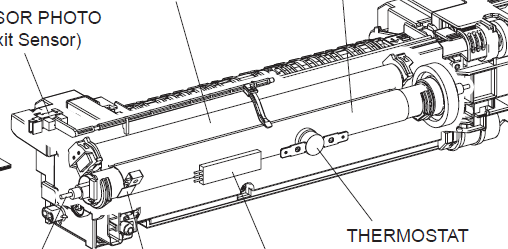
Note : The screws for the fuser are Torx 15 or 20 with a post in the middle. This makes them near impossible to open. To get around this problem I use a small flat blade screwdriver. Wedge it between the torx slots and you can unscrew the screws.
010-377 Restart Printer – Reseat Fuser Contact Support
Pressing three keys (<↓> + <↑> + <√>)
shows detail error code.
Line1 010-377
Line2 Code:XX
01: NC circuit fail
02: NCD snap out
03: NCD fail
04: NCC snap out
05: NC comp fail
06: NC-STS temp over
07: STS-NC temp over
08: NC comp fail
09: NC overheat
0A: STS snap out
0B: STS overheat
0C: Low temp1
0D: Low temp2
0E: Timeout 1
0F: Timeout 2
10: Timeout 3
11: Relay cutoff 1
12: Relay cutoff 2
13: Relay cutoff 3
Service Manual Troubleshooting Tips.
1. Does the error still occur when the power is turned OFF and ON.
2. Checking after reseating the FUSER ASSY, Reseat the FUSER ASSY.
3. Checking the connectors for connection, Remove the FUSER ASSY.
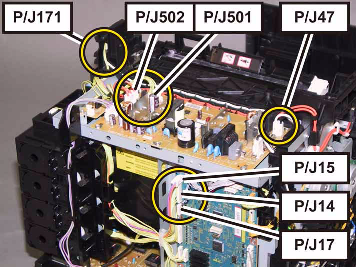
Check the connections between the PWBA MCU (P/J17) and FUSER ASSY (P/J171).
Check the connections between the FUSER ASSY (P/J171) and PWBA LVPS (P/J47).
Check the connections between the PWBA LVPS (P/J501 and P/J502) and PWBA MCU (P/J14 and P/J15).
Reconnect the connector(s) P/J17, P/J47, P/J171, P/J501, P/J502, P/J14 and/or P/J15 correctly,
4. Checking the HARN ASSY FUSER2 for continuity
Disconnect J17 from the PWBA MCU.
Disconnect J47 from the PWBA LVPS.
Is each cable of J17 and J47 <=> P171 continuous?
NOTE: P171 is attached to the frame.
5. Checking the HARN ASSY LVPS2 for continuity
Disconnect J14 from the PWBA MCU.
Disconnect J501 from the PWBA LVPS.
Is each cable of J14 <=> J501 continuous?
6. Replace the FUSER ASSY.
NOTE: After replacement, be sure to clear the life counter value.
Fuser Life Reset Procedure
1. Get into “Customer Mode†hold (“up arrow” key and”Down Arrow†while switching the machine on)
2. Press the “Down Arrow” key several times until “Parameter” is displayed. Press the ” Select ” key once.
3. Press the “Down Arrow” key several times until “Life Fuser Sheet” is displayed. Press the “Select” key once.
4. Press the “Down Arrow” key until “Initializing” is displayed. Press the ” ✔” key once.
5. Press the ” Select” key once, and Initializing the Life Counter of the Fuser is performed.
6. Machine should display “Initializedâ€.
For more details and pricing options click on the link below for more information.
Dell 2130CN OEM Fuser Assembly, X722D, M266D, 330-1426, 330-3107, P241D

