Xerox 6128 MFP No Power GFI Problems
I had a call last week of a Xerox 6128 MFP that had no power. So in this article I’d like to talk about diagnosing and troubleshooting the no power problem in these machines.
Obviously the first step is to try a different power cable or wall out. If that doesn’t fix your problem check out the back of the machine where the power plugs in. I don’t see this very often but these machines have a GFI, Ground Fault interrupter. You see these more often on larger machines so it was odd to see it on this machine. But if it gets tripped it does have a reset white button. So you could try to reset the GFI. Also it has a test button on it. So if it is getting voltage it should trip when you press in the test button and reset with the big white button.
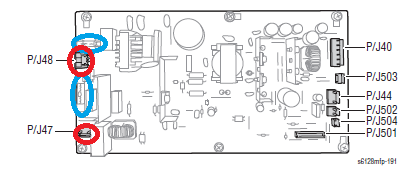
Ok, if that all fails like it did in my case then you will need a volt meter. First, remove the back cover and check the two fuses on the LVPS circled in red above. Obviously you should have continuity across the fuse. If not replace the blown fuse and retest. If both of the fuses test ok. Check for 120 or 220 depending on country on the power cable. Plug the power back in and check for AC power going from the top two pins on the GFI to the power on switch. If no then replace the GFI, in my case. If yes then turn on the power and check for AC on the bottom black and white connector on the LVPS, circled in blue. If no then replace the power switch. If yes then replace the power supply. I didn’t put in the LVPS removal but if you remove the back cover it’s right there. Just remove the cables and screws on the corners.
[contentblock id=2]
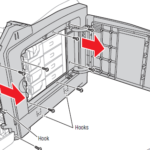
1. Loosen the captive screw that secures the ESS Cover. Gently pull the cover back and swing the cover open.
2. Remove the two screws (silver, tap, 8mm) that secure the Rear Cover.
3. Open the Toner Door.
4. Remove the 8 screws (silver, tap, 8mm) that secure the cover to the chassis.
5. Disconnect P/J482 and the FASTON terminal FS484 on the GFI breaker.
6. Remove 2 screws (silver, tap, 12mm) that secure the GFI Breaker in the chassis to remove the breaker.
Alright, hopefully that has helped you solve the no power issue in your machine. If you have any questions or need any further help please leave a comment below.
[contentblock id=1]
Find well displayed printer parts diagrams at: http://www.printerworks.com/


