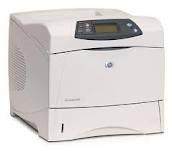
HP Laserjet 4200, 4300 maintenance kit Replacement Procedure Instructions
The HP laserjet 4200, 4300 printer maintenance kit provides you with the most commonly used parts that wear throughout the machines. I have several HP laserjet 4200’s and 4300’s in the field that the only time I get calls on the machine are for maintenance kit replacement.
Replacing these worn maintenance kit parts will allow for maximum paper feed, quality print performance, and reduce the need for unwanted service calls. Everybody is always looking for the HP laserjet 4200, 4300 maintenance kit reset procedure to just reset the maintenance counter. I strongly advice avoiding this tactic. HP has done a good job at rating these maintenance kit parts to their full life cycle. If you just reset the maintenance kit message and neglect to replace the parts you will be calling in for service shortly after for image or feed problems that could have been avoided if you had just installed the user maintenance kit when advised.
Specifications Models using this maintenance kit : HP Laserjet 4200/4300
Expected Duty Life:200,000 pages
OEM Part Number: Q2429-69001 (HP 4200)
HP Q2429A 110V Printer Maintenance Kit
OEM Part Number: Q2436-69001 (HP (4300)
Hewlett Packard Q2436A Maintenance kit for hp laserjet 4300 series
HP Laserjet 4200, 4300 Maintenance Kit Parts
1 Transfer Roller RM1-0699
1 Tray 1 P/U Roller RL1-0019
6 Tray 2 Feed/Separation Rollers RM1-0037
1 Fusing Assembly RM1-0101 (HP 4300)
1 Fusing Assembly RM1-0013 (HP 4200)
—————— WARNING ——————
Turn the printer off, unplug it, and allow it to sit for 30 minutes before performing these maintenance kit procedures.
Transfer Roller Removal and Replacement On the HP laserjet 4200, 4300
1. Open toner access door and tray 1
2. Remove toner cartridge
3. Lift the gear (right side) of the transfer roller up
4. Slide to the left and remove
5. Slide right side of roller into right bushing
6. Align left side collar making sure the open end is face down and push in
CAUTION: Do not touch the surface of the transfer roller. Contact with skin oils can cause print quality problems
Tray 1 Pickup Roller Removal and Replacement On the HP laserjet 4200, 4300
1. Locate and slide apart the two latches on each side at the top of the roller
2. Rotate the top of the roller out and lift away from printer
3. Place alignment pins on new roller into slots and snap in
Tray 2 Feed and Separation Roller Removal and Replacement on the HP Laserjet 4200, 4300
1. Remove the tray from the printer
2. Open access door next to the roller
3. Pinch the blue tab and slide the roller off the shaft
4. Slide new roller on making sure the tab locks.
5. Locate the feed roller in the top of the tray cavity.
6. Repeat steps 3 and 4
Make sure you double-check the rollers by pulling on them slightly to make sure they have locked. It’s easy for even seasoned technicians to quickly install these feed rollers and then 20 to 30 prints later have jam issues because they didn’t verify the rollers were truly locked in place. Been there, done that.
NOTE: The removal and replacement process are the same for the feed and separation rollers on tray 3 and the 1500 sheet feeder.
Fusing Assembly Removal and Replacement On the HP laserjet 4200, 4300
1. Open rear output bin and pull out extension
2. Remove output bin from printer
a.) On the 4200 bend the middle of the bin down to release the pivot pins
b.) On the 4300 locate the finger notch on the left side of the bin, push tab towards the bin and swing left side out and away
2. Push the blue tabs on the fuser up and pull fuser out of printer
3. Push the new fuser into the printer making sure both blue tabs lock
4. Install the rear output bin and check for proper operation
Resetting the Maintenance Kit Count on HP Laserjet 4200, 4300 Printers
1. Hold down check button while powering on the printer until all three control panel lights remain lit
2. Press the UP arrow until “NEW MAINTENANCE KIT†is displayed
3. Press the check button
4. Verify proper reset of maintenance count
a.) Select “PRINT CONFIGURATION†from the Information menu
b.) Check that the ‘Pages since last maintenance’ entry on the configuration page is set to zero.
c.) If not, repeat steps 1 through 3
Hopefully that will help you with your HP Laserjet 4200, 4300 maintenance kit replacement procedure.
Find printer service newsletters, parts, and more at: http://www.laserpros.com/


