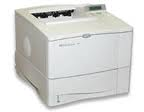
HP LaserJet 4000, 4050,4100,4100MFP 13.20 Paper Jam Error
By far the most common error I get calls or questions on is the 13.20 Paper Jam. Error message 13.20 means that when the printer was turned on, during printing, or while the printer was trying to initialize one of the sensors was detecting that there was media present were it should not be. There are two places in the machine that can cause this error. One, in the fusing unit and second, in the front of the machine behind the MP tray pick up assembly.
Fuser
First, if you have installed a PM kit or fuser recently you might want to pull the fuser out and check on the left side of the unit. There is a sensor on the top of the unit that sometimes gets knocked out-of-place during shipping. It doesn’t usually fall out but one side will get knocked loose so the sensor sits at an angle so when the sensor flag moves through it gets caught on the sides of the sensor and sticks.
MP Tray Pick Up Assembly
Second, and the most common place for 13.20 jams is in the front of the machine behind the MP tray pick up assembly. On old models without the updated MP tray pick up assembly you can remove the toner, the black protective cover over the MP pick up roller, and open the jam cover that swings up and towards the front of the machine (has blue markings on it). If it opens up you might be able to see and gently remove the jam. Best way to remove jams in this area is to grab it with two hands and slowly pull up. Pulling down through the cassette area can break the sensor flag and usually results in tearing the paper causing additional problems. On new style MP tray pickup assemblies they put a metal bracket across the jam cover making it impossible to open it. If that’s the case or you couldn’t remove the jam by pulling on it then you can try the half file folder trick. Take a file folder rip in half or use something that is a heavy card stock (60 to 80 lb.), remove the cassette tray, toner, and push it up through the cassette area to the top of the machine and pull it out through the toner area. Do not do this from the toner area to the cassette area because the sensor flag can only move one way so if you force it the other way it will either break or unseat itself requiring removal of the MP tray pick up assembly.
For Technicians
Personally, from a technician point of view, I just remove the whole pick up assembly. Therefore, I can make sure all the paper is removed, check the feed roller assembly for rust that can result in a 41.5 error, look for any nicks or scratches caused by customers trying to remove the jam themselves, and rebuild the MP tray clutch assembly because at this age there are all getting gummed up and need to be cleaned out and lubricated to avoid rattling from the front of the machine. The whole process takes about a 1/2 hour and you are covering a lot of issues and preventing others. With the top cover off you can also remove the laser cover, clean off the mirrors, and if the control panel buttons aren’t all working, clean off the contacts.
Additional Printer Repair Articles can be found at : http://www.metrofuser.com/

