Kyocera Laser FS1370DN Fuser Replacement Instructions
Below you will find the Kyocera FS1370DN Fuser Replacement Instructions along with links to purchase a new fuser if needed. The instructions are pretty easy to figure out and can be done by someone with some basic mechanical skills.
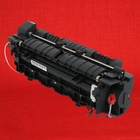
Kyocera FS1370DN Fuser Unit – 110 / 120 Volt (Genuine)
Top Cover Removal
1. Open the top cover.
2. Remove two screws.
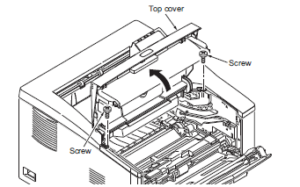
3. Extract the boss from the hole.
4. Unhook the A hook.
5. Unhook two B hooks.
6. Remove the connector.
7. Remove the top cover.

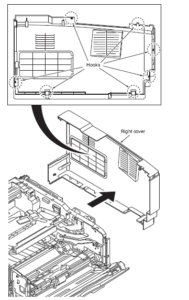
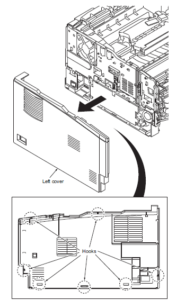
Side Covers Removal
1. Remove the top cover
2. Remove the cassette
3. Open the front cover.
4. Unhook seven hooks and then remove the right cover.
5. Unhook seven hooks and then remove the left cover.
Kyocera Laser FS1370DN Fuser Replacement
1. Remove the outer covers.
2. Remove two connectors.
3. Release the wires form wire clamps.
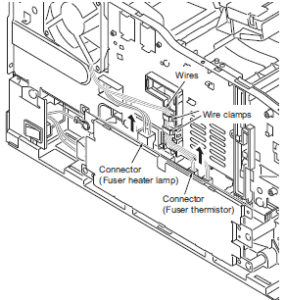
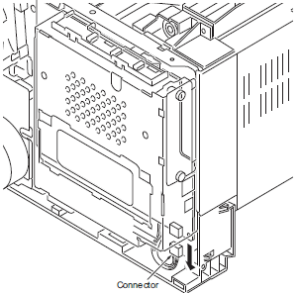
4. Remove the connector.
5. Open the rear cover and then remove the rear cover.

6. Remove two screws and then remove the fuser unit.
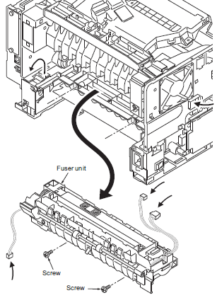
7. Check or replace the fuser unit and refit all the removed parts.
Kyocera FS1370DN Fuser Unit – 110 / 120 Volt (Genuine) – $116.95 Genuine 302LZ93050 Fuser Unit – 110 / 120 Volt for Kyocera FS1370DN; Fuser Assembly / Unit – Genuine Kyocera Mita Fuser Assembly; Kyocera 302LZ93050 / FK-170U / 2LZ93050 |

