Instructions for the Lexmark T654, T652, T650 Charge roller Replacement
The charge roller gets replaced every 300,000 prints during the 80 Scheduled Maintenance. If you are running high volumes of prints and using OEM toner cartridges then you have a good chance of only needing to replace this part at that time. Below find the instructions for the Lexmark T654, T652, T650 Charge roller Replacement.
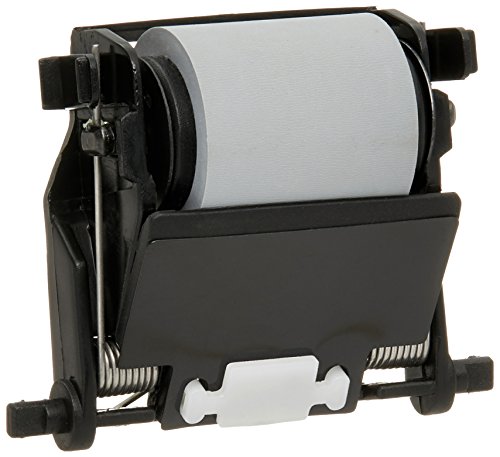
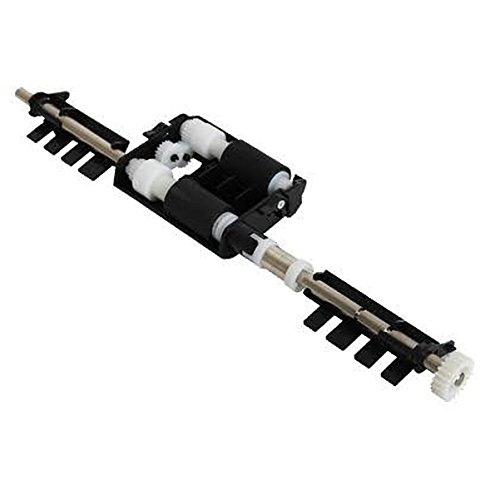
LEX40X0127 – Lexmark 40X0127 Charge Roll Assembly

The average going price for these is around $40 for an OEM version. If you see if for $10 to $15 I would question if it is a true OEM
The charge roller is what cleans and charges the surface of the drum before printing. If the rollers get contaminated typical signs are vertical grey areas or back ground in certain parts of the page. In worse case scenarios it can lead to totally black pages. Usually, if you are experiencing print quality issues I first try the toner cartridge, inspect the fuser, and check the charge roller. More often than not, most my print quality issues on these machines stem from toner or charge roller issues. In most cases a third party toner has contaminated the charge roller. Also, companies sell third party charge rollers. Personally, I feel that I get more life out of the OEM charge rollers and experience less print quality issues with them. Therefore, I recommend to buy OEM charge rollers to save some frustration and more frequent repairs on your office equipment.
Lexmark T654, T652, T650 Charge roller Replacement
Note : It might be easier to remove the charge roller if you slightly lower the top cover door. This will lower the arms that hold the charge roller in place, making it easier to separate the roller post from the holder. Careful that you don’t bend the holders to far as they can break.
WARNING: When removing and installing the charge roll assembly, avoid touching the charge roll surface.
1. Open the MPF door assembly.
2. Open the operator panel front cover assembly.
3. Detach the left side of the charge roll assembly from the machine.
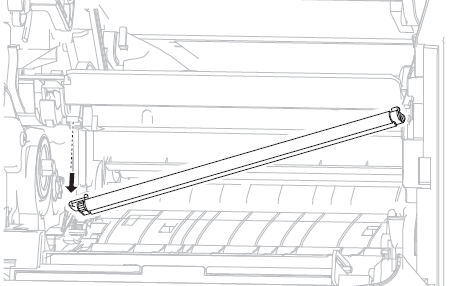
4. Detach the right side of the charge roll assembly from the machine.
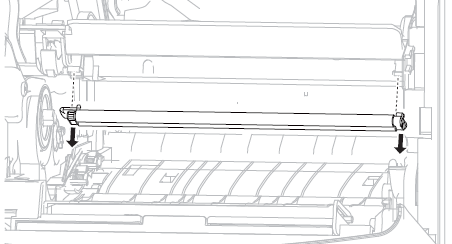
5. Remove the charge roll assembly.