Lexmark T654, T652, T650 Print cartridge Cooling Fan Replacement
On this page get information on the Lexmark T654, T652, T650 Print cartridge Cooling Fan Replacement along with links to purchase a new fan if needed and a list of the error codes that can cause fan replacement.
40X4359 -Lexmark T65X Print Cartridge Cooling Fan – 40X4359

Lexmark T654, T652, T650 Error Code 927.11- 17 Print cartridge Cooling Fan Messages
If you receive one of the messages listed below then you have a problem associated with the print cartridge cooling fan.
Error Code 927.11
Error Code 927.13
Error Code 927.14
Error Code 927.15
Error Code 927.16
Error Code 927.17
Note : Unplug the power cord before performing the below procedures. Removal of some of the covers differ from the different models so the pictures below might not match exactly with what your machine looks like but for the most part the differences are minor.
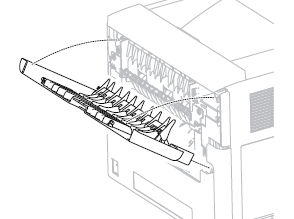
T654, T652, T650 Door assembly, rear removal
1. Pull the door assembly, rear away from the machine.
2. Twist the door strap left or right until vertical, and pull the strap out of the slot.
3. Position the door assembly, rear at a 45 ° angle as shown in the picture.
4. Remove the door assembly, rear.
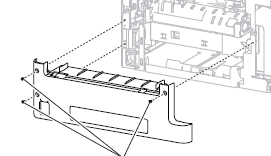
T654, T652, T650 Fuser access door assembly removal
1. Press the two tabs on the fuser access door assembly, and detach it from the machine.
2. Swing the fuser access door assembly away from the machine.
3. Unsnap the fuser access door assembly from the machine.
4. Remove the fuser access door assembly.

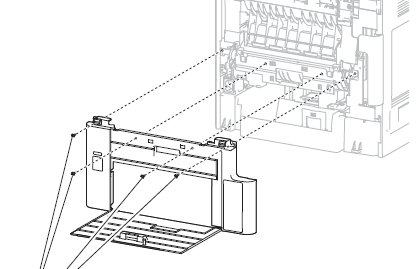
T654, T652, T650 Rear Lower Cover assembly removal
1. Open the rear lower door.
2. Remove the three screws securing the cover assembly, rear lower to the machine.
3. Remove the cover assembly, rear lower.
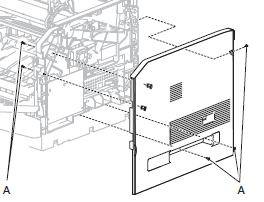
T654, T652, T650 Right Side cover removal
1. Open the operator panel door assembly.
2. Open the MPF tray door assembly.
3. Remove the cover assembly, rear lower. Go to “Cover assembly, rear lower removal (T650)†on
4. Remove the five screws securing the side cover, right to the machine.
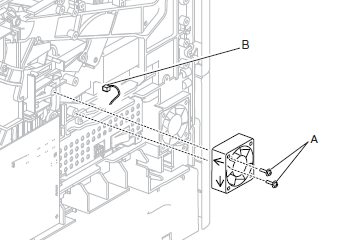
Lexmark T654, T652, T650 Print cartridge Cooling Fan Replacement
1. Remove the screw securing the print cartridge cooling fan to the machine.
2. Remove the print cartridge cooling fan.
3. Disconnect the connection from the print cartridge cooling fan.
Replacement Warning: When replacing the print cartridge cooling fan, ensure that it is installed as shown in
the picture.
–