Instructions for the HP LaserJet M601, M603, M602 Laser Scanner Replacement
I don’t really have a lot to say about this article. The main reason is to give illustrated instructions on the HP LaserJet M601, M603, M602 Laser Scanner Replacement Procedure for errors like the 51 and 52 service errors.
HP RM1-8406-000CN Laser/scanner assembly New Pull
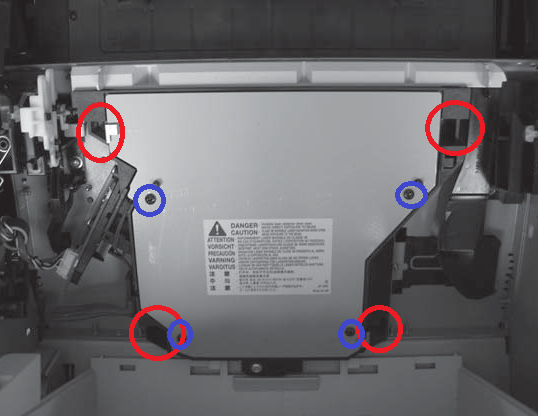
This article might also be helpful if you need to clean out the laser scanner, which I had to do the other day. If you need to clean out the laser scanner then just follow the top cover removal and the laser scanner is exposed. Remove the four screws ( Circled in Blue ) holding the laser scanner top cover ( grey / silver with yellow warning label ) and remove to expose the optics inside.
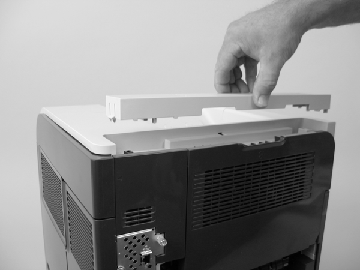
Top-accessory cover Removal
Lift the top-accessory cover up and off the product.
Top cover Removal
1. Open the rear-output bin, the print-cartridge door, and the front cover.
2. Use needle-nose pliers to release the print-cartridge drive-arm tab.
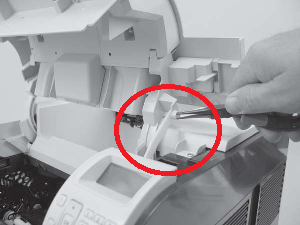
CAUTION: The print-cartridge drive-arm tab is easily broken.
TIP: Push the print-cartridge drive-arm back into the product to avoid damaging it when you remove the top cover.
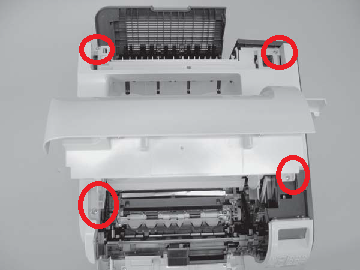
3. Remove four screws.
4. Partially close the print-cartridge door, and then use a small flat blade screwdriver to release two tabs.
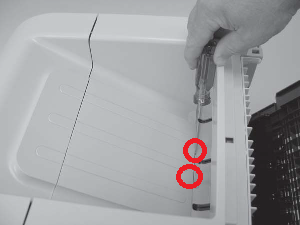
NOTE: Make sure that these tabs are fully seated when the top cover is reinstalled.
5. Lift the top cover up and off of the product to remove it.
CAUTION: The accessory pin is not captive. Do not lose the pin.
Formatter cover and formatter cage Removal
1. Grasp the formatter cover.
2. Pull the cover straight back and away from the product.
3. Remove two thumb screws.
4. Carefully slide the formatter cage away from the product to remove it.
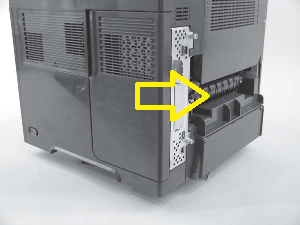
Right-side cover Removal
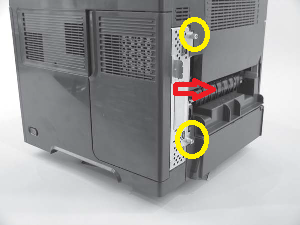
1. Release two tabs.
TIP: Look for the arrows embossed into the cover to locate the tab.
2. Carefully separate the cover from the product near the control panel.
3. Rotate the top of the cover away from the product, and then and lift the cover up to remove it.
HP LaserJet M601, M603, M602 Laser Scanner Replacement
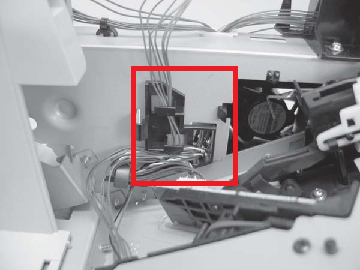
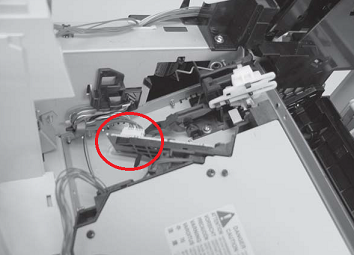
1. Unplug the laser/scanner wire-harness connector from the DC controller PCA .

2. Remove the laser/scanner wire-harness from the wire guide.
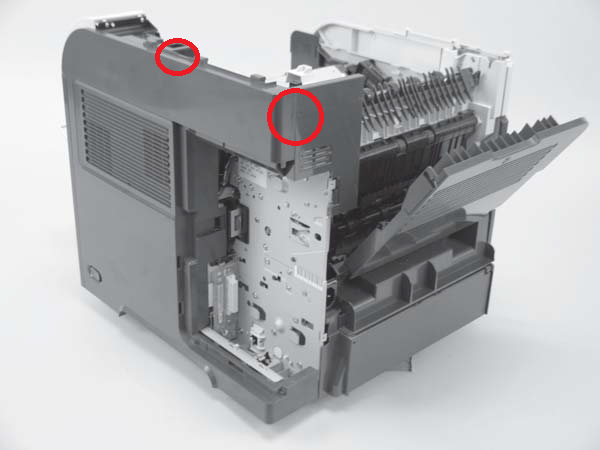
3. Remove four screws and the grounding clips. Circled in Red
4. Disconnect the laser/scanner wire-harness from the laser/scanner PCA.
5. Carefully lift the laser/scanner up and out of the product. Make sure that the laser/scanner assembly does not catch or snag the wires along the bottom of the assembly when you remove the assembly.
CAUTION: When you reinstall the laser/scanner assembly, make sure that the wire-harnesses are correctly routed through the cable guides. If the wire-harnesses are not correctly routed, they can be damaged when the top cover is installed.
NOTE: Make sure that the air duct is correctly positioned and that the laser/scanner shutter properly functions.
–

