Brother HL- 5340, 5370, 5380 Fuser Replacement

Instructions for the Brother HL- 5340, 5370, 5380 Fuser Replacement
The fusing assemblies in these machines are rated at around 100,000 prints. At this time the machine will come up and give you a replace fuser message. The good news is that this will not cause the machine not to work. However, the fusing assembly is probably going to need replaced. Brother has done a good job of rating the life of these units. Typically, when I get called out on a machine that has this message, the fusing assembly is showing signs of extreme wear and lots of times already starting to cause minor print quality defects. Below you will find illustrated instructions for the Brother HL- 5340, 5370, 5380 Fuser Replacement.


–
Brother HL- 5340, 5370, 5380 Fuser Replacement Procedure
Caution : Before you start this procedure you will want to power off the machine, unplug it, and let it sit 15 to 30 minutes to cool off.
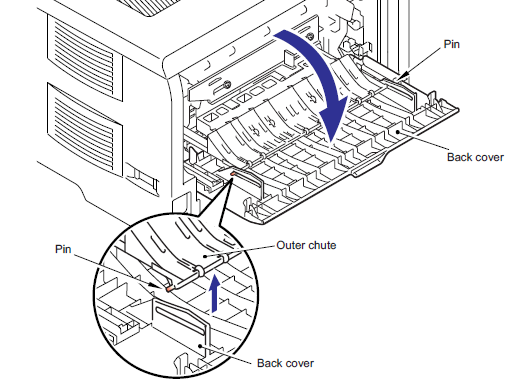
1. Open the Back Cover
2. Remove the Post of the other chutes from the Back Cover
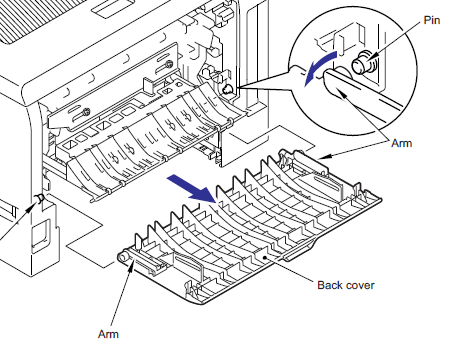
3. Remove the Arms of the Back Cover From the Pins
4. Remove the Back Cover
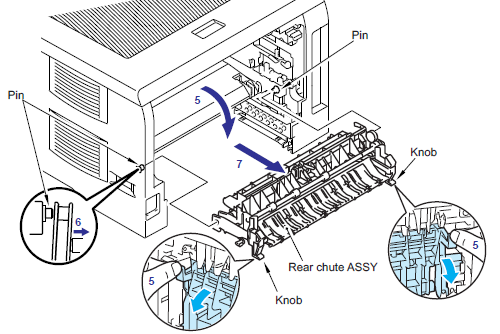
5. Hold the Knobs on the Rear Chute Assembly and pull down this to your side.
6. Remove the Arms of the Rear Chute Assembly from the Pins.
7. Remove the Rear Chute Assembly.
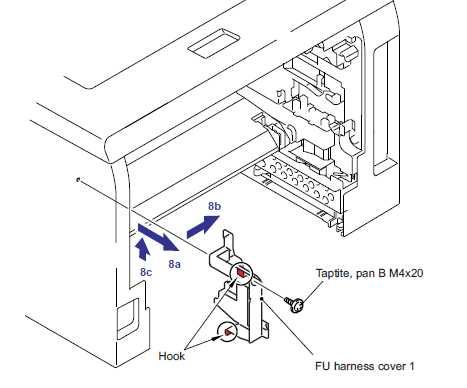
8. Remove the screw holding the AC Fuser Connector Cover.
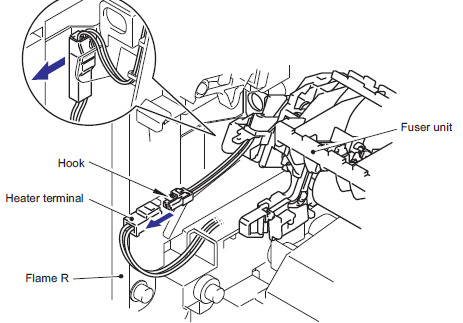
9. Disconnect the connector of the Heater Terminal while pressing the hook of the connector of the fusing assembly.
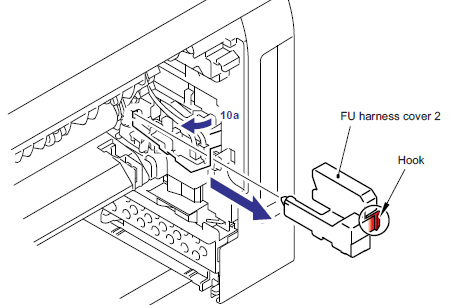
10. Remove the Thermistor Connector Cover.
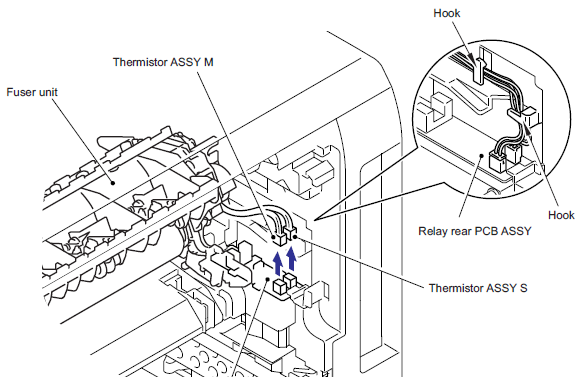
11. Disconnect the connectores of the thermistors from the relay PCB assembly and remove the harness of these thermistors.
12. Remove the one screw and gently pull the fusing assembly out.
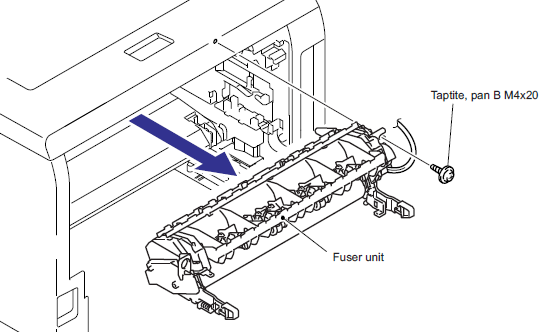
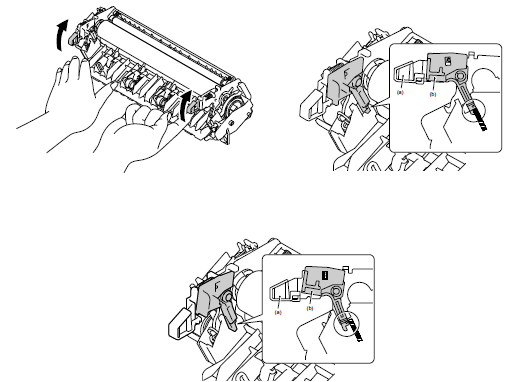
Note : The new fusing assembly has pressure release levers on either side. This is done to prevent the pressure rollers getting flat spotted. When you first install this unit the levers have to be released for proper operation.
Warning : Failure to reconnect the connectors when installing will result in a fuser error. Make sure you fully seat the connectors before turning the machine back on.