Diagnostic Aids for the Canon MF6595 – MF6530 Blank Pages or No Print
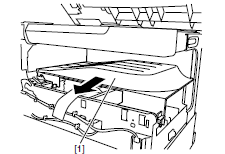
One of the main problems I’ve seen on these machines is the Canon MF6595 – MF6530 Blank Pages or No Print problem. Most times I see this after a new cartridge is installed in the machine or if a paper jam occurs and the left side door needs to be opened. On the front of the scanner is a shield to keep dirty and dust out of the unit. What I’ve found is that the shield either gets knocked out of place or deformed and it blocks the laser from writing to the drum unit.
Fixing the Canon MF6595 – MF6530 Blank Pages or No Print
On this particular model I just remove the shield from the unit. The laser scanner is buried in the machine and doesn’t generally get a lot of dust in this area. Now there is another version of this model that uses an open toner system. If you have one of those I would recommend reforming or reseating the shield as I think the shield should stay in those models. Below you will find the removal procedure to get to the laser scanner and I’ve provided a picture of the laser scanner so you can see what part needs to be removed, reseated, or reformed. It can be removed without removing the laser scanner assembly.
Click on the pictures below for a blown up view of them
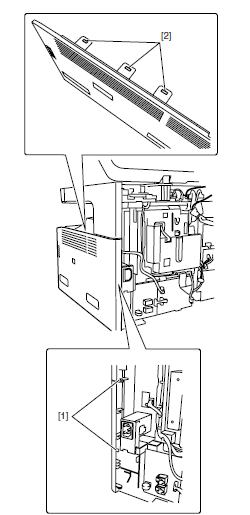
Detaching the Right Cover
1. Detach the rear cover.
2. To release the hooks at the lower right of the machine, float the right side of the machine about 5 cm above the edge of the desk and so on.
3. Release the two claws at the rear back of the right cover.
4. Using a flathead screwdriver, release the three claws at the top of the right cover.
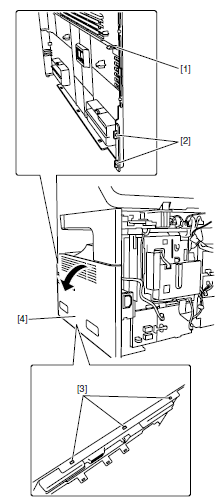
Detaching the Front Cover
1. Remove the cassette.
2. Using a flathead screwdriver, release the two claws at the right and four hooks at the top.
3. By releasing the two bosses at the bottom, detach the inner cover.
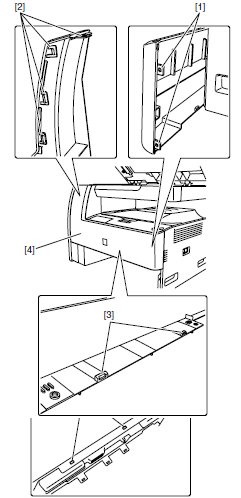
Detaching the Delivery Tray
1. Remove the rear cover, the front cover, the right cover, the reader rear cover and the reader right cover.
2. Detach the operation panel.
3. Detach the delivery tray from the front.
Laser Scanner Shield Removal
Once you get everything removed you will be able to see the laser scanner assembly. The red square shows that the shield goes from the front of the unit to the back on of the unit as seen from looking at it from the front of the machine. The yellow square shows the actual part. The gray metal shield is held in place or two post. All you have to do is pull it towards you and over the post. Once you get it off the front post then you can push the shield towards the back of the machine to remove it from that post. Now you can remove it from the machine. I generally just leave it out at this point but if you want you can reform it. While your in this area you can open and close the left side door or remove and install the toner cartridge to see how these parts cause the shield to open and close.

Obviously this is not going to solve all your issues if your machine is printing blank pages. There are lots of other reasons your machine can be having this issue. This is just one fix that I have ran into on more than one occasion.