Brother 9460, 9560, 9970 – Fuser Unit Reset and Removal

Fuser Unit Reset and Replacement Instructions for the Brother MFC 9460, 9560, and 9970 Machines
Not much to say at the beginning of this article. At 60,000 prints or copies the machine will give you a replace fuser message. At this time I highly recommend replacing the fusing assembly. Failure to do so will lead to unwanted print quality issues and unexpected downtime in your Brother product. Below is the replacement instructions for the fusing assembly along with the reset procedure.

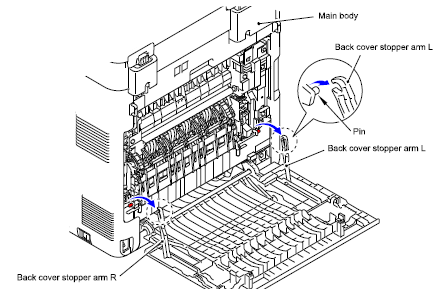
1. Open the Back Cover.
2. Remove the Back cover stopper arm L and R from the Main Body.
 –
–
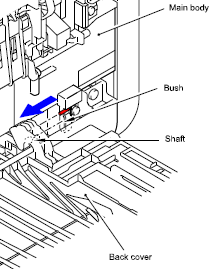
3. Remove the Shaft of the Back cover from the Bush on the right side of the Main body.
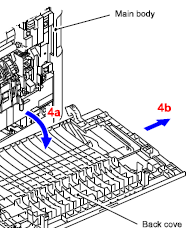
4. Remove the Back cover.
5. Open the Back flapper Assembly.
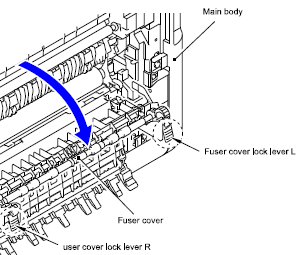
6. Release of the Fuser cover lock lever L and R and open the Fuser cover.
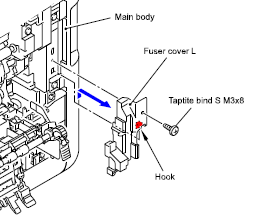
7. Remove the Screw fromt he Fuser Cover L.
8. Release the Hook to remove the Fuser cover L from the Main body.
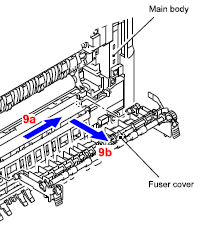
9. Slide the Fuser cover in the direction of the arrow to remove it to the front.
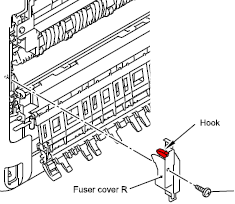
10. Remove the Screw from the Fuser cover R.
 –
–
11. Release the Hook to remove the Fuser cover R from the Main body.
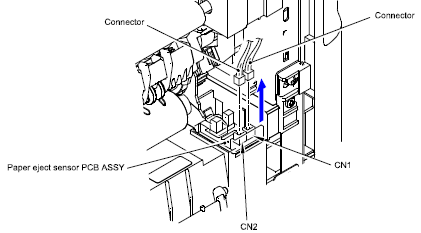
12. Disconnect the two connectors from the Paper eject sensor assembly.
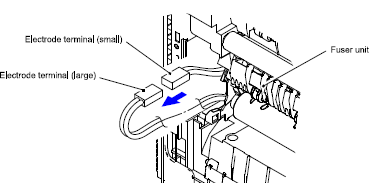
13. Disconnect the AC power cable from the Fuser unit.
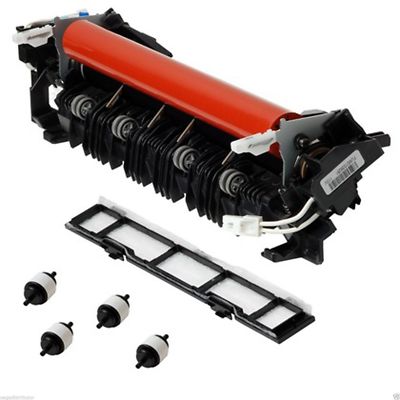
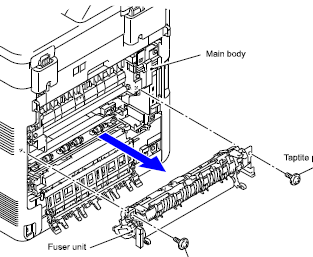
14. Remove the two screws t remove the Fuser unit from the Main body.
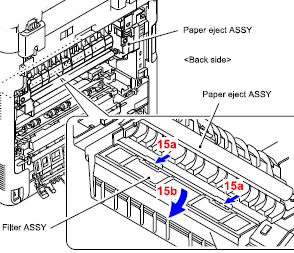
15. Remove the Filter assembly from the Paper Eject Assembly.
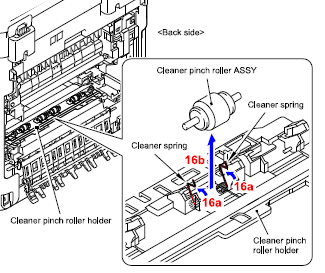
16. Hold down the Cleaner sprint of the Cleaner Pinch roller holder to remove the Cleaner pinch roller assemblies.
 –
–
– Replace Fuser Unit Message Reset Procedure
1. With the machine at a ready state press the 3 and 9 buttons at the same time.
If done correctly “Reset Menu” will appear on the display.
2. Use the up or down arrow to scroll to the part “Fuser” and press OK.
3. When the display shows ↑ for reset and ↓ for exit. Press ↑ for reset.
Touch Panel is slightly different. When you scroll through the reset menu and press ok for the part you want. The display will say reset yes/no. Press the yes button and the display will say accepted.
How to replace the fuser unit for brother HL-4150CDN 4570CDWT MFC-9460CDN 9560CDW printer
Post by http://www.tm-toner.com . To reset the HL-4150cdn please check our support site at http://www.TM-toner.com/support Leave us a comment at : http://tmtoner.com/support/index.php?/Knowledgeb...

