Rebuilt Fuser problems in the HP P4015 resulting in 13.06.00 Jam Inside Rear Door
Over the past few years I’ve been struggling with rebuilt P4015 fusing assemblies. Mainly I’ve seen lots of poor fusing, ghost print, and smearing with these rebuilt units. I’ve tried several different suppliers and all come out the same. About 1 out of 5 is not going to work properly. Not very good odds and one I don’t like to present to my customers. The 13.06.00 Jam and 13.05.00 Jam Error I received today was yet another example of the problems related to rebuilt fusers.
I was called out to my customer today to troubleshoot a P4015 that was experiencing jams underneath the toner cartridge area going into the front of the fusing assembly. When it jammed if one opened the door and removed the toner cartridge, there was 1 or two pieces of paper wrinkled up right in front of the fuser with the first page about an inch inside the unit. After pulling the fuser out I noticed that the lower pressure roller outer coating had started to peel off and the roller was warped all over.
[contentblock id=2]
I ended up talking to my HP parts supplier about this situation because I’ve been having so many issues with these units with multiple suppliers. My supplier said that because of the high speeds generated with these machines that everybody is having problems duplicating the durability of the OEM fusers. So they recommended on heavy volume machines like the one my customer has to use OEM fusing units.
HP P4014 P4015 Fuser Maintenance Kit CB388A
Conclusion about the 13.06.00 Jam in the HP P4015 Printer in Rebuilt Fuser
I kinda already knew I was going to have to go that route but it was nice to hear a supplier pretty much say the same thing I was thinking. I’ve had other suppliers tell me they have no problems with their product only to talk to other techs from other companies to find out they are running into the same issues. Like toner cartridges every supplier claims their product is the best. Unfortunately with rebuilt fusers on the P4015 I’ve yet to find a good supplier and I use some of the best rated in the country. So I would recommend on these machines, especially the ones with monthly duty cycles, to use OEM fusers. OEM fusing assemblies will probably cost you more but worth not having the head ache in the long run.
Fuser Removal Procedure
Wait 5 to 10 minutes Before Removing the Fuser to allow it to cool down and make sure you unplug the machine.
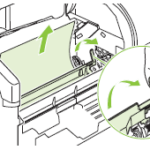
Rear output bin
1. Open the rear output bin.
2. Squeeze the hinge pin out of its mounting hole.
3. Rotate the output bin away from the product until the right hinge pin is released, and then remove
the output bin
Fuser
1. Remove the rear output bin.
2. Squeeze the blue fuser-release tabs.
3. Pull the fuser straight back and out of the product.
CAUTION: Do not drop or jar the fuser. It can easily be damaged if it is mishandled.
TIP: When you replace the fuser, make sure that it is fully seated into the product. You should hear both sides snap into place.
HP P4014 P4015 Fuser Maintenance Kit CB388A
[contentblock id=1]
Find well displayed printer parts diagrams at: http://www.printerworks.com/


I have had the same issues with 4015’s jamming just as the paper enters the fusing unit. After extensive troubleshooting, I have found the cause to be failure of the pressure release mechanism in the fusing unit. As the machine is in its copy cycle, the fusing unit is releasing the pressure between the upper and lower fused rollers, enough that it can’t continue moving the paper at the proper rate to activate the exit sensor at the proper time, triggering a13.05 error code. It will also stop moving the paper entirely and cause a jam with the leading edge of the paper just entering the fusing unit.with a second piece of paper on top of the first. This is your your 13.06 paper jam. If you look at the error log you will see 13.05 and 13.06 errors grouped together. They’re both caused by the pressure in the fusing unit not being great enough to facilitate and maintain movement of the paper.Whether or not this is related to rebuilt fusers only is debatable, however there is certainly a pretty strong possibility that someone has overlooked the pressure release mechanism in the process of a rebuild. I haven’t yet had time to come up with a resolution to the failure, but hopefully the information contained within, will allow one of the many gifted technicians out there to beat me to the punch and come up with the solution. I hope this post is informative and useful to all of you in the trade.
Im stuck with the same issue and still could figure out
Thanks for yall tips