Ghost or Smeared Print in the HP Laserjet P3015 Fuser
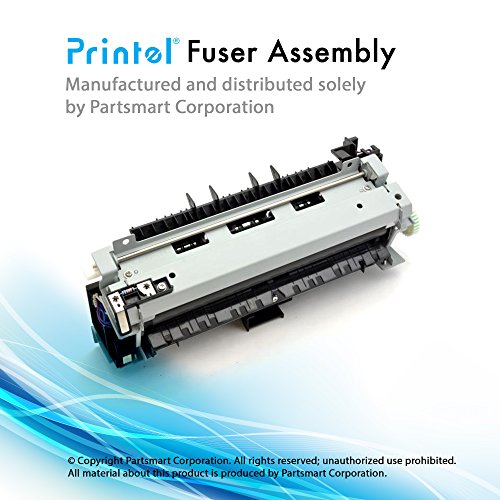
While the HP P3015 fusing assembly is ten times better than the P3005 fuser, they are still bound to wear out or get the occasional rip in them that can result in ghost or smeared print. In this article I’d like to discuss of few of the things that can cause ghost or smeared print, give you some tips on diagnosing the problem, and give some instructions on how to replace the fusing assembly (RM1-6274-000CN) if needed.
Troubleshooting Ghost or Smeared Print 
Best thing to troubleshoot ghost or smeared print is to open the rear door and with a flashlight check the dark brown surface of the fusing film for any obvious signs of wear,tears, miscolorization around the edges, or toner build up. Second would be a half test or the fuser test page described bleow. Half Test – Print off a config page and when the page is half way through the machine open the top cover and remove the toner. If your lucky the page will be underneath the toner with print already on the page. If the smeared or ghost print is already on the page before it’s fused then try another cartridge. If the print looks good on the page before fused then most likely the fuser is the problem child. I say the first thing to try is to check the fusing assembly because of the speed of these machines it can be tricky to run a half test on this model.
[contentblock id=2]
Fuser test page
This test helps to determine if the fuser needs to be replaced, or if it has exceeded its expected life. If the page shows no problems, the fuser does not need replacing.
Replace the fuser if the page shows the following problems:
â— Fuser offset repeats in the boxes on the page
â— Lines or streaks on the page (usually down the edges of the page) indicate fuser contamination
1. Press the Menu button .
2. Press the down arrow button or the up arrow button to navigate to the DIAGNOSTICS menu, and then press the OK button.
3. Press the down arrow button or the up arrow button to navigate to the PRINT FUSER TEST PAGE menu, and then press the OK button.
Fuser Replacement
Rear-door assembly
Unplug Machine and let sit for 10 minutes to cool.
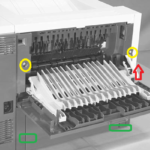
1. Open the rear door.
2. Gently pull down on the door and lower the door until it is fully open.
3. Push up on the link arm to release it.
CAUTION: The link arm is under spring tension. Do not let the link arm snap back toward the
product when you release it.
4. Remove two screws.
5. Open the lower-rear door, and then release one tab.
6. Release one tab.
7. Rotate the bottom of the rear-door assembly away from the product.
8. Pull down on the rear-door assembly to remove it.
Right-rear cover
1. Slide the right-rear cover toward the inside of the product to release it.
2. Rotate the bottom of the cover away from the product, and then pull down on the cover to remove it.
Fuser
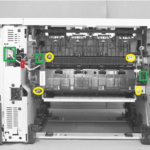
1. Duplex models only: Release two tabs on the duplex media-feed guide, and then slide the guide toward the back of the product to remove it.
Reinstallation tip Make sure that both tabs snap back into place when reinstalling the duplex media-feed guide.
2. Disconnect three connectors, and release one wire harness from the retainer.
3. Remove four screws.
4. Pull the fuser out of the back of the product.
CAUTION: To avoid damaging the fuser, the cartridge-door assembly must be closed before you
remove the fuser.
Conclusion
Like I said earlier ghost or smeared print is not as common on these machines as earlier models. I’ve worked on several that have had well over 150,000 prints and the fuser film looked like it was still in great condition. Something you would never see on a P3005 fuser. However fuser problems is unavoidable, given time and age they eventually will need to be replaced. The fuser, RM1-6274-000CN, probably receives most of the wear and tear on these machines besides the pick up roller so they will have to be maintained if you plan on doing a lot of printing. Hopefully, this article has helped you troubleshoot and resolve ghost or smeared print error on your HP laserjet P3015 printer.
[contentblock id=1]
For More information involving Printer Repair and some articles I have written check out: http://blog.marketpoint.com/
Find well displayed printer parts diagrams at: http://www.printerworks.com/


Thanks!