Document Jam Issues Located in the ADF Can Be Frustrating
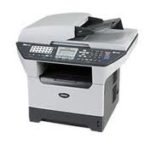
I was working on a Brother 8870 the other day that had a bad document jam. After repairing the machine I thought there was no way a customer could ever figure out and resolve this error without any help. With Brother being by far the strongest small to midsize multifunction machine in the market place I thought I should share some of my experiences with the document jam error. Thus, more people will have the opportunity to fix these machines so they don’t end up throwing them away and regretting it later when their new machine doesn’t work as good as the old machine. In this article I will discuss the several things that can cause the document jam error on these Brother machines and how to go about fixing them when they do happen.
Troubleshooting the Document Jam Error 
1. Paper doesn’t even make it into the feed path. Typically dirty feed rollers cause this type of Document Jam. Open the document cover and using a damp cloth clean the pick up and intake rollers along with the black roller just to the left and the grey rollers further left. I’ve talked about this in another article but a lot of time if you clean the intake roller the ADF will start to moan as the clean rubber slides over the ADF sep pad and pressure springs. In the one I serviced today bending the pressure leaf springs down a little removed the sound.
2. Document Jam message that will not go away even after all paper has been removed. Main place I found this is under the SB/ SX chute assembly. Located right in the middle of the ADF feed path is a grey plastic cover that hides some feed rollers and a feed sensor. Customers get a paper jam and remove it. Everything looks clear but I small torn piece gets stuck on the sensor causing a constant paper jam message. Can’t see the sensor unless the SB/ SX chute assembly is removed that’s why I included it in the removal procedure.
3. The third type of document jam and the one I ran into the other day is when foriegn material, torn pieces of paper, or poor paper quality results in constant jams in the ADF. Obviously if you have a document that has been folded up, dog-eared, or just plain looks bad, always make a copy from the flatbed glass. If you do get a constant paper jam in a certain area, before you remove the paper open the ADF top cover or ADF lid to find out where the lead edge of the paper is. A lot of people just pull the paper out every time it jams and don’t think to look to see if anything in the feed path is obstructing the paper path. Three areas are hard to see and most likely cause document jams that can’t be seen. First is under the SB/SX chute assembly that I talk about removing below. Second, is around the scan reference bar. If you open the ADF lid like your going to make a copy on the flatbed you will note on the bottom left of the ADF lid is a spring-loaded white bar. Paper is pressed against the glass strip in this area and the opening for the paper is really tight. foreign objects like paper clips and staples love to get caught in here. If you see something and it doesn’t come out easy. Don’t go digging around with a screw driver. Remove the ADF chute assembly and pull it out. Scratching the plastic in this area can lead to more frequent paper jams. In my case the jam was in the exit area just before it feeds back out. Again if it jams in this area the only way to see what’s going on is to remove the ADF chute assembly and lift it up slightly to see if anything is in the feed path. I found a ripped off corner of a page stuck in this area. Removed the paper debris, reinstalled everything, and the machine tested OK.
Removing the Document Feeder to get those hard to find Document Jam Problems
ADF Cover Assembly
1. Turn the document cover upside down. Remove the ADF cover assembly from the ADF unit
ADF Side Cover Front
1. Push the hook from underneath the ADF unit to release the latch, and remove the 2 screws from ADF side cover front.
2. Remove the ADF side cover front from the ADF unit.
ADF Side Cover Rear
1. Push the hook from underneath the ADF unit to release the latch, and remove the 2 screws from the ADF side cover rear.
2. Remove the ADF side cover rear from the ADF unit.
ADF Chute Assembly
1. Disconnect the 7 connectors or 3 connectors from the ADF relay PCB
2. Disconnect the connector of the ADF motor harness from the ADF motor.
3. Remove the screw and ADF FG harness.
4. Turn the Document cover upside down and remove the screw.
5. Turn the document cover the correct way up and remove the 4 screws from the ADF chute assembly.
6. Release the hook to remove the ADF chute assembly from the document cover LGL sub assembly.
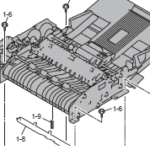
I included the full instructions on the ADF chute removal. However if you just want to pull it up to check for paper debris in the exit paper path then you can just remove the four screws at the corners and gently pull it up a little to get underneath to the exit path.
SB Chute Assembly/ SX Chute
1. Remove the 2 screws
2. Remove the SB chute assembly or SX chute from the ADF chute assembly.
Conclusion about the Document Jam Error in the Brother MFC 8860, 8460, 8660, 8870 DCP 8065, and 8060 Multifunction machines.
Alright, hopefully that has helped you walk through some of the easier troubleshooting tips for the document jam error in the ADF on Brother MFC 8860, 8460, 8660, 8870 DCP 8065, and 8060 Multifunction machines. I love these machines and think they are by far the best value for your hard-earned dollar. I have several machines now over 200,000 copies and still going strong in the field. Everyone I sell these to always thanks me later. With a few tips you can work through these machines problems and keep it running for the years to come.
For More information involving Printer Repair and some articles I have written check out: http://blog.marketpoint.com/

