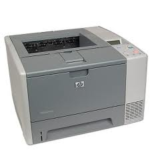
50.1 Fuser Error in the HP Laserjet 2400, 2420, 2430 Printer
Like any other HP laser printer the 50.1 fuser error message resulting from a low temperature condition in the 2400, 2420, and 2430 printers is probably the most common fuser error found in these machines. Several things can cause the error. In this article I will discuss a some situations that can cause the error, a few easy troubleshooting tips, and how to replace the fusing assembly if needed to resolve the 50.1 fuser error message.
Troubleshooting the 50.1 Fuser Error in the HP Laserjet 2400, 2420, and 2430 Printer
Here is what the service manual has to say about the 50.1 Fuser Error.
1. Turn the printer off, and then turn the printer on again.
2. If the message persists, turn the printer off and allow it to cool down.
3. Verify that the correct model of fuser is installed.
4. Verify that the correct voltage fuser is installed.
5. Reinstall the fuser, and check the connection between the fuser and the printer. Replace the connector if it is damaged.
6. If the message persists, replace the fuser.
7. If the message persists, replace the ECU.
8. If the message persists, replace the power supply.
Alright, step 1 turn off and back on. Sometimes the fusing assembly just takes to long to warm up. Seen more in old fusers. By turning it off and back on it starts to heat up again. Fusers are given a set amount of time to warm up if they don’t reach that temperature in time then they display the 50.1 fusing assembly error. By turning it off and back on it sometimes gives it that extra amount of time it needs to get to the right temperature. Step 2 is to allow it to cool down. Kind of the opposite needed for this error but by unplugging it and letting it set 20 to 30 minutes you allow the capacitors to discharge in the unit. Sometimes this will clear error codes like the 50.1 fuser error stuck in the memory and also let the machine start its warmup procedure from a cold state. Once again this can help the machine reach its correct operating temp. Step 3 and 4 make sure the right fuser is installed. If you just replaced it you could have accidentally ordered or had the wrong unit shipped to you. The 220V fuser could cause this error in 120v machines. Steps 5 check your connectors. Pretty obvious. Step 6,7, and 8 are to replace parts. Very rare that you will ever have to go past the fuser.
Other things to look for
Powerstrips, Battery backups, and other large devices plugged into same outlet or circuit can reduce power supplied to the printer resulting in the 50.1 fuser error because it doesn’t have enought power to properly heat up. HP always recommends plugging these in to a way outlet. Never plug them into a Battery backup.
Fuser Removal on The HP Laserjet 2400, 2420, and 2430 For the 50.1 Fuser Error
Back Cover
1. Open the rear output bin all the way by pressing the door down disengaging the door stops. All the way down the door should be at a 90 degree angle. Remove the two screws.
2. At the bottom of the back cover behind the dust cover door are two alignment tabs. Disengage those by pulling from the bottom and lifting the cover away from the machine.
I/O Cover
1. Pull right and lift away from machine.
Fuser
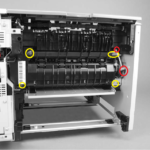
1. Remove the fuser-cable cover by releasing one tab on the cover and then rotating the back of the cover toward the center of the printer
2. Remove the duplex inlet guide by releasing the two tabs and pull it out towards you.
3. Disconnect the two cables on the right side and unclip the wire holder on side of frame securing the top cable.
4. Disconnect the power cable on the left and remove the four screws near the corners on the fuser.
5. Gently remove the fuser from the back of the machine.
Conclusion about the 50.1 Fuser Error in the HP Laserjet 2400, 2420, and 2430 Printers
Majority of the time when you get the 50.1 fuser error you will end up replacing the fusing assembly. Below is a link for the fuser and beside it is a gear kit that I would recommend installing at the same time. The gears in back of these machines wear down and the printer tends to get a growling sound in the back. Overtime it will turn into a grinding sound if not taken care of. Sometime the gears in the fuser wear with those drive gears so after replacing the fuser the noise can get worse. The gears take a few minutes to replace and since you have the fuser out it should be done at this time
HP 2400 Noise Reduction Gear Kit
Hp Laserjet 2420/2430 Fuser Assembly Rm1-1535
Find additional printer service tips, manuals, and parts diagrams at: http://www.lbrty.com/resources.html/


