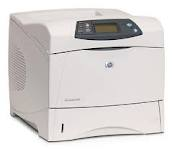
Instructions For Light Print Repair HP Laserjet 4200, 4240, 4250
The light print problem in the HP laserjet 4200, 4240, 4250 can be frustrating. Instructions can help you fix your problem quickly. More common is light print on the left side but given time it can go throughout the whole page or in this model in random areas going vertical down the whole page. As the machine ages dust and debris builds up on the front mirror and polygon motor mirrors. The polygon mirrors on top of the laser scanner motor rotate at around 20,000 to 50,000 RPM’s depending on the machines speed. Like a floor fan in your house the outer edges of the mirrors, as they rotate, tend to attract more debris and dust. As this dust builds up on the polygon mirrors in the laser unit the laser image doesn’t write as clear to the drum as it use to. The result is faded print on your paper. Like steam on a mirror, once you clean the mirrors off inside the laser scanner assembly, you can see better and get rid of the light print on your HP laserjet 4200, 4240, and 4250.
Tips for Cleaning Your HP Laserjet 4200, 4240, 4250 Printer
For some reason on th HP laserjet 4200, 4240, and 4250 printers, more than others, toner and dust likes to get up in the front mirror of the laser unit and cause random light print throughout the page. Usually in the middle of the page or just off to the side. I believe it’s mainly a result of canned air and rebuilt cartridges that cause most the problems I see. If I’m using can air in this model I always make sure I cover the laser slot with a towel before I blow the machine out.
Troubleshooting light print in a HP Laserjet 4200, 4240, 4250 Printer
I added more detail to the troubleshooting tips. Instead of making this article extremely long I decided to create a new article and link to it. Below is the updated article for further assistance on your light print issues.
Troubleshooting Light or Faded Print – HP Laserjet Printers
Laser Scanner Cleaning Procedure for Light Print on a HP Laserjet 4200, 4240, 4250 Printer
Removal: Formatter Cover
1. Grasp the cover by its rear lip and pull it firmly toward the rear of the printer until it stops.
2. Remove the cover from the printer
Tray 2 Extension Door – On Top Cover Above rear Door
1. Just Pull it up to expose the two rear screws for the top cover
Top Cover
1. Remove the four screws holding the Top Cover (two are underneath the tray 2 extension, and two are on top of the printer under the Top Cover).
2. Open toner cartridge door. Remove the Toner Cartridge Drive Arm by using needle-nose pliers to pinch the pin from its hinge on the Top Cover.
3. Squeeze the right front side of the Top Cover to remove it. It may be necessary to use a small flat-blade screwdriver to release the tab inside the small hole.
4. Lift the Top Cover up slightly.
5. Tilt the left side up and locate the control panel cable underneath the control panel and disconnect. Now you can completely remove the top cover.
Note: The control panel cable is really short unlike the early 4000 series so be a little bit more careful when removing and reinstalling. It can be a little tricky getting it reinstalled.
1. Remove 4 screws. (3 black, 1 silver) Bend metal clips back slightly.
2. Lift and remove cover.
3. Make sure if you remove the foam seal underneath the cover that your reinstall correctly.
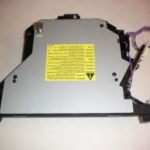
Cleaning the Laser Scanner Unit
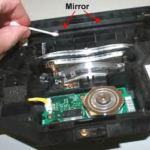
If the laser scanner is relatively clean inside then I would just clean the front mirror shown in the picture below and the motor mirrors located in the bottom of the unit on top the motor. Use a Q-tip to clean the mirrors. If you see any build up on the Q-tip get a new one before proceeding to the next mirror. The most important thing here is to take your time and be gentle. The motor mirrors are metal and extremely delicate. They are very easy to scratch. You should notice before you clean the units a build up of dust and debris on the mirrors. Especially on the left side of the motor mirrors. If the unit is very dirty inside then I would clean all the mirrors and lens inside the unit and blow it out before I put it back together.
Conclusion about Light Print in the HP Laserjet 4200, 4240, and 4250 Printer Repair
The light print problem in the HP laserjet 4200, 4240, and 4250 is becoming a more common issue as these machines age. Hopefully the article above will help you troubleshoot and diagnose your problem so you can resolve your light print issue in your HP laserjet 4200, 4240, and 4250 printer and get your machine up and running without any further print quality problems.
Find printer service newsletters, parts, and more at: http://www.feedroller.com/


