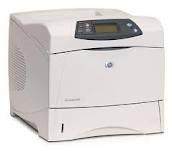
HP Laserjet 4240, 4250, 4350 50.1 fuser error Low Temp. Issue
On HP laserjet 4250, 4250, and 4350 machines the HP fuser errors like the 50.1 is a result of the thermistors inside the fusing reading a low temperature error . The 50.2 and 50.1 fuser errors are probably the most common fuser errors reported on HP laserjet printers. Several things can cause the error so I will walk you through the more common causes of the error and give you a few tips on how to possibly fix the issue without having to replace the fusing assembly.
HP LaserJet 4240, 4250, 4350, RM1-1082, Fuser Assembly
Troubleshooting the Laserjet 4240, 4250, 4350 50.1 Fuser Error
As I have mentioned in several articles the first thing to try is just turning the machine off and back on. With the 50.1 fuser error the machine is at a low temperature state. Sometimes just restarting the machine will bring it up to the correct temperature. Second thing to check for is where the machine is plugged in. These high powered machines need to be plugged into a wall outlet. If you see it plugged into a power strip or battery backup it needs to be unplugged and plugged into a wall outlet. Other devices plugged into the same circuit could reduce the power given to the laserjet resulting in the printer not getting to its correct operating temperature in the time allowed. Age is another factor that can result in the 50.1 fuser error. Inside the fusing assembly is a heating element. Over time the element gets worn and it takes more power and time to get up to its right temperature. Again if it doesn’t get up to temperature in the time designed by the machine a fuser error will be displayed on the control panel.
Conclusion about the HP Laserjet 4240, 4250, 4350 50.1 Fuser Error
The final thing to try if nothing else has worked is to turn the machine off, unplug it, and let it sit for 20 to 30 minutes. The memory inside the machine can keep an error reported for so long. By letting the machine sit unplugged for an extended amount of time it can allow the machine to clear the error and when it starts up the next time go through its normal power up sequence. Before you power the machine back on you might try also reseating the unit to make sure its making proper contact with the connector inside the machine. If this step fails then you probably will need to replace the fusing assembly. Below is the instructions for removing the fuser followed by a link to purchase a new fuser. Hopefully the above tips have helped you work through the 50.1 fuser error on the HP laserjet 4240, 4250, and 4350 printer.
HP Laserjet 4240, 4250, 4350 Fuser Removal
Note: Unplug power and communication cables and allow at least 10 minutes for cool down before fuser removal.
1. Open the rear output bin. Use your finger to squeeze the hinge pin (formatter side) out of its mounting hole.
2. Rotate the output bin away from the printer until the right hinge pin is released, and then remove the output bin.
3. Squeeze the blue fuser release tabs
4. Pull the fuser straight back and out of the printer.
HP LaserJet 4240, 4250, 4350, RM1-1082, Fuser Assembly
Find printer service newsletters, parts, and more at: http://www.feedroller.com/


